Friday, June 3, 2011

100% Whole Grain Chocolate Chip Cookies with Walnuts and Shaved Chocolate

Cookies are delicious. Especially if they have chocolate in them (in fact, its kind of a requirement.) But what makes a cookie especially sweet in my book is when it can pack a little bit of nutrition in there too.

I came across a cookie called "The Ultimate Whole Wheat Chocolate Chip Cookie" on Whole Grain Gourmet and knew it was one I had to check out. 
Upon further inspection I noticed the ingredients were very similar to my very favorite "imitation Double Tree" cookies with slight differentiations. 

For example, they both had the same amount of flour, butter, eggs, and sugar but the proportion of how much brown sugar to granulated sugar was different. They also used the same technique of grinding the oats into a fine powder so they better blend with the rest of the ingredients.

Though it was similar, where it differed intrigued me. It didn't have the addition of toffee bits (Would it stay as moist?) It used walnuts instead of pecans (which nut proves best to compliment the cookie?) and it called for the addition of shaved chocolate (Would that make the cookie spread more? How would the flavor profile change?)

With these distinctions, I knew the outcome would be a different overall cookie experience, instead of the same cookie with the exchange of whole wheat flour for all purpose.
***

I find it helpful to set up all my stations first. I sift all my dry ingredients, I put together the ingredients to be creamed, measure out all of the add-ins, and lay out my eggs and butter so that while I'm doing all of the other stuff, they can get closer to room temperature (but really, I don't worry too much about the eggs being room temp) When I'm all ready, I'll usually put the butter in the microwave on power 1 for half a minute-one minute to get it where I want it to be. It should not be melted, but soft and able to be indented with the touch of your finger.

Step by step photos, for your pleasure: (Or scroll down for the recipe)

You will need white whole wheat flour, oats, dark brown sugar, sugar, kosher salt, baking powder, baking soda, dark chocolate chips, a dark chocolate bar, walnuts, butter, imitation vanilla, and one egg.
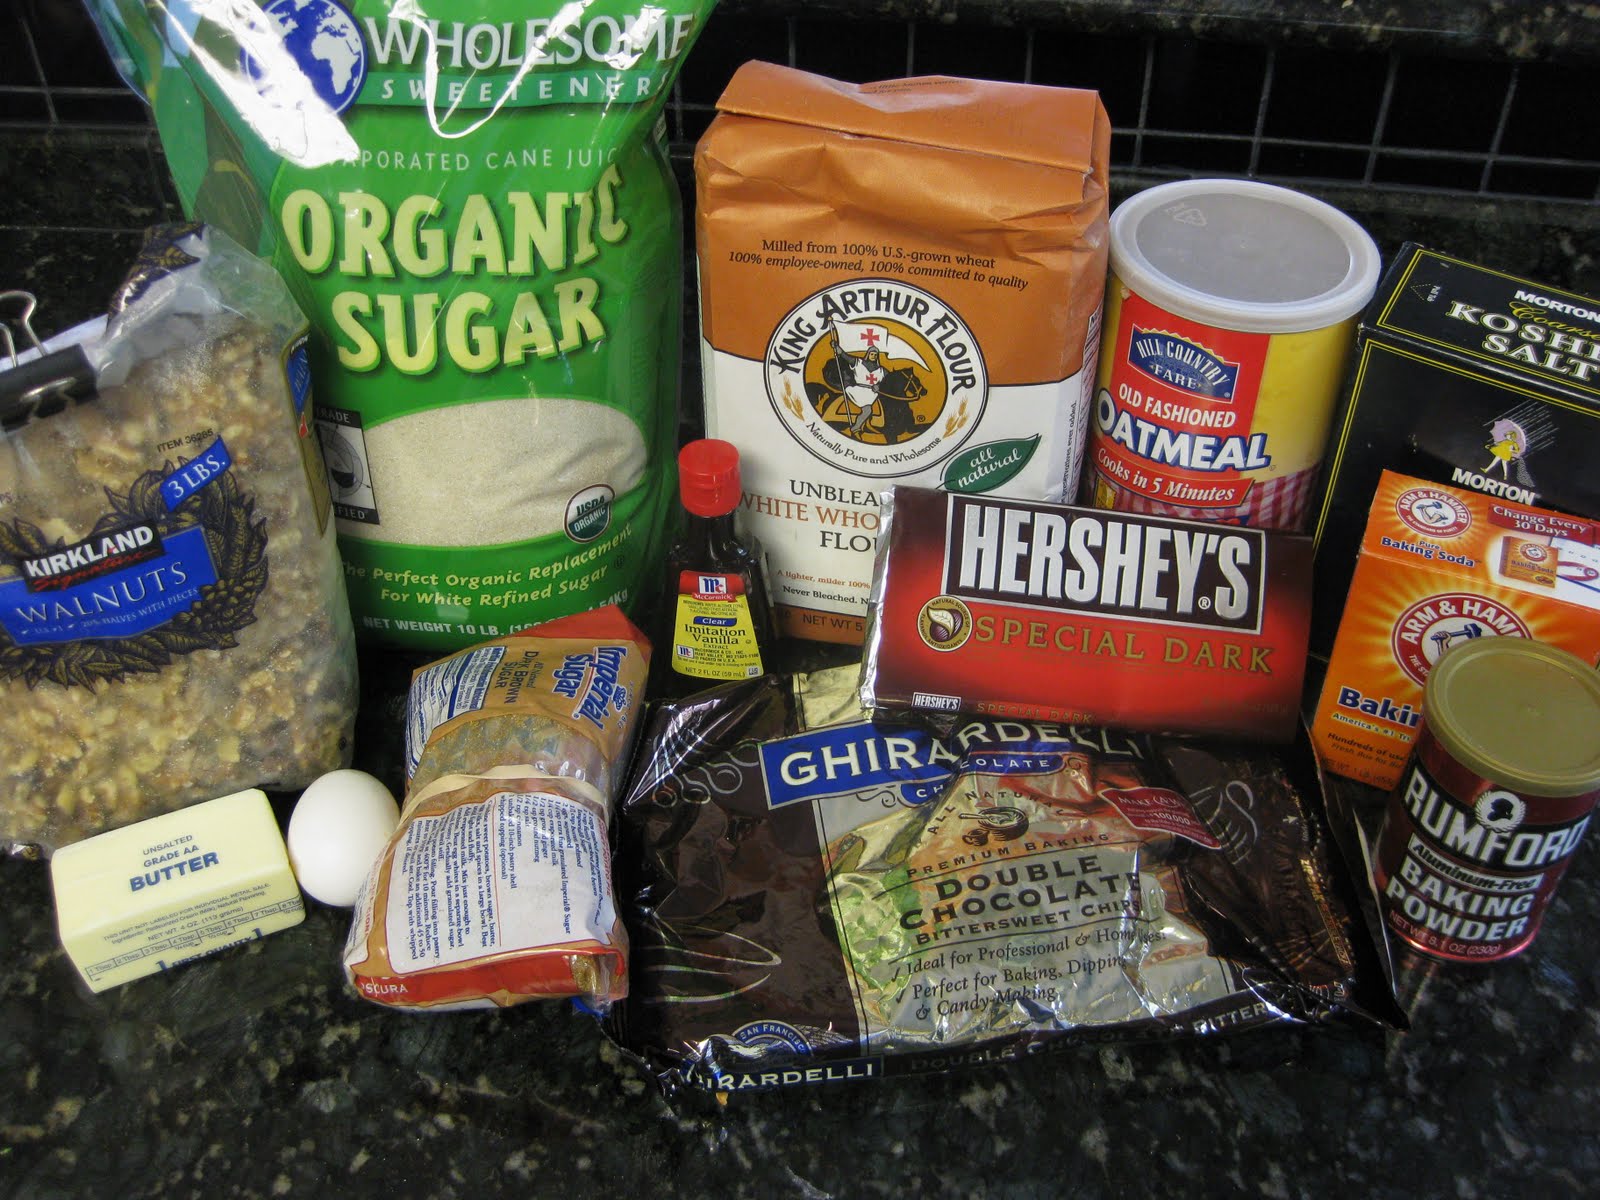
Not sure why I chose imitation vanilla or kosher salt? Reference this post.

The recipe called for a 60% cocoa or better dark chocolate bar, but I just bought cheapo Hershey's special "dark" and called it a day. Don't judge.

Oh and that huge bag of organic sugar? Costco, my friends. Oh, and those walnuts and the butter too. I <3 Costco.

First, grind the oats into a fine powder and then sift with the rest of the dry ingredients-
Then, gather and measure all of the add-ins. I grated about half that bar and toasted the walnuts (a must with any nut for cookies!)
Quick tip: Place walnuts or whatever nut you need to toast (room temperature or straight from the freezer) in your microwave straight on the plate around the outer edges. Microwave for about a minute, move them around (keeping them on the outer edges for even cooking) and then microwave for about a minute or less until they start to sizzle and smell toasty. Watch them to make sure they don't burn! SO much faster to toast them this way than through the oven or in the pan via stove-top. Tastes just as great, too!

Doesn't that grated chocolate look to die for?
Alright, now put the brown sugar, sugar, and butter in a bowl (or if you're fancy, in the bowl of a stand mixer.)
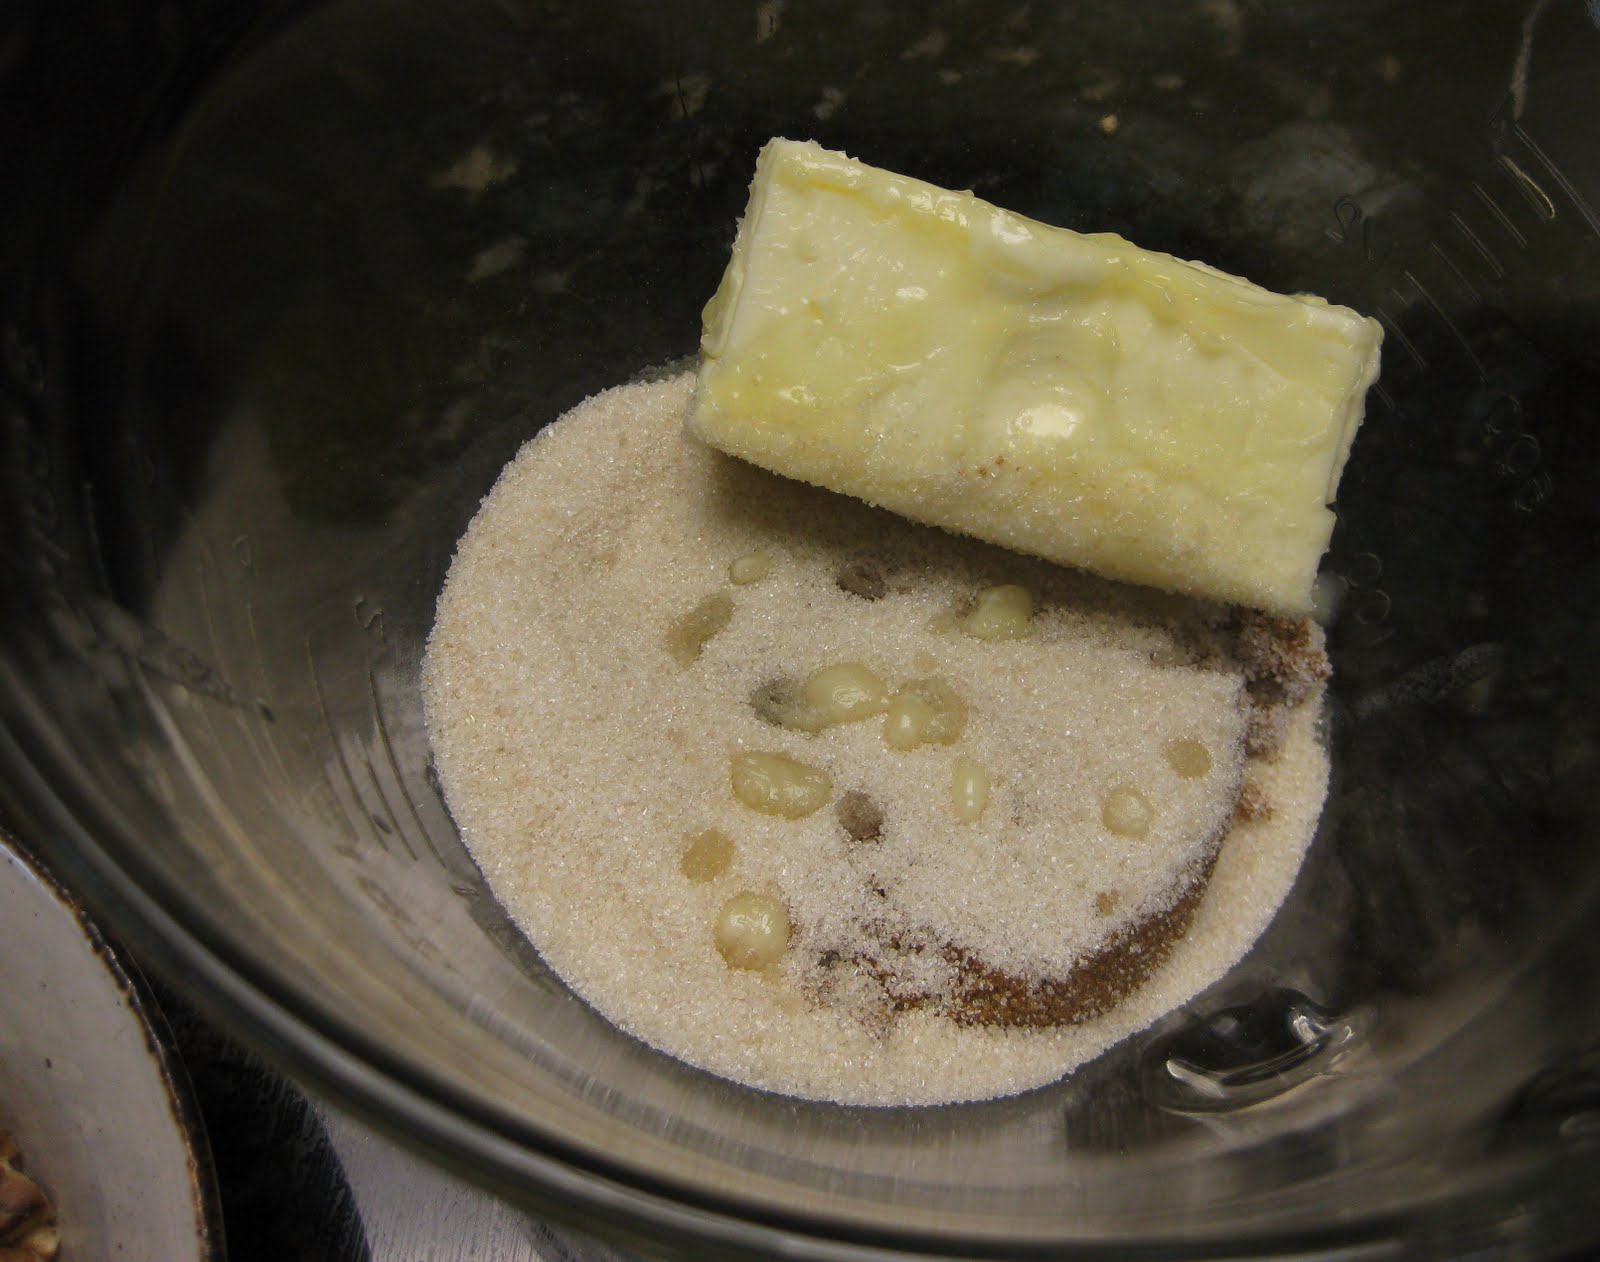
Butter just got a little too melty for my liking, but eh not too bad.
Alright! Time for creaming. The mixture will change in color by becoming much lighter and will be emulsified instead of gritty. 
Just keep mixing on high till you get to around here-
Yes, the beaters look tempting..but focus!
Much better. (:

The creaming took me about 3 to 4 minutes.
Now add in one egg and the vanilla extract.
Perfect. It is now time to add the dry ingredients that were already sifted together. If you have a fancy stand mixer, feel free to add the dry ingredients gradually on slow speed. Unfortunately, my hand mixer has one speed- super fast, so I will be stirring by hand. 

 Most of the oats will be ground so fine they disappear into the dough, but not all of it. That's normal! It adds texture and is a good thing.
Gently stir in the add-ins-
And presto! Delicious cookie dough ready for baking.
But wait! Practice a little self control and refrigerate the dough for 1 to 2 hours. It's not required (and not mentioned in the original recipe), but it will help all those whole grains absorb the moisture and let the flavors develop. 

After a good chill, I placed 9 dough balls (40 grams each, but next time I would do 35 grams each) on a baking sheet.

 Awaiting their fate...muahahaha.
Baked at 375 degrees for 12 minutes.
They won't spread much, but I like that because then the middles can stay a little gooey. You can flatten the balls slightly before baking if you'd like them a little flatter, though.
It's a little hard to tell when they're done, because they don't brown a whole lot. I think I may have over baked mine because they were a bit dry the next day. I would say next time that I would bake them for 10 minutes and then take them out no matter what they look like. These cookies have a lot more structure than others, so you won't have to worry about them collapsing. If they turned out a little under-baked, all the better!

In the end, you are awarded with an incredible cookie. Dense and thick, chocolaty beyond belief, bitter yet sweet at the same time. A true winner.
And to answer my original questions-
Yes, the toffee bits add moisture to the cookie, but aren't vital. This cookie quite simply has a different flavor profile than the double tree ones. 

The walnuts worked very well in this cookie. The bitterness that walnuts can sometimes have was counterbalanced nicely. I would keep using walnuts in this cookie, but pecans in the Double Tree ones.(once again, different flavor profile)

No, the cookies did not spread more because of the addition of the shaved chocolate. In fact, they spread less because they did not have toffee bits (which melt when baking) and included a bit more oats (more structure).

And to my question "How would the flavor profile change?",  that has already been thoroughly discussed.

Would I make these again? Without a doubt. It's also a great base for other additions. Next time, I might try using mini peanut butter cups instead of chocolate chips, and peanuts in place of the walnuts (but keep the shaved chocolate addition).

No one will ever notice that these are made with whole wheat flour and ground oats. There's too many amazing flavors going on! 

Ultimate Whole Wheat Chocolate Chip Cookies
Adapted from Whole Grain Gourmet
Ingredients:
 1/2 cup unsalted butter, softened
 1/2 cup dark brown sugar, packed
 1/2 cup organic sugar
 1 egg
 1 1/2 teaspoons imitation vanilla
 1 cup (4.5 ounces) white whole wheat flour
 1/2 teaspoon baking powder
 1/4 teaspoon baking soda
 heaping 1/4 teaspoon kosher salt
 1 1/4 cups old-fashioned rolled oats
 3/4 to 1 cup dark chocolate chips, 60% cocoa
 3/4 cup toasted walnuts, chopped
 1 (1.5 to 2 oz) dark chocolate bar, grated
  Preparation:
 1.     Preheat oven to 375 degrees.
 2.    Place oats in a food processor and process until it turns into a powder. 
 3.    In a medium bowl, whisk together the powdered oats, flour, salt, baking powder and baking soda. 
 4.    In a large bowl, cream together butter and both sugars for 3 minutes on medium speed. Beat in the egg and vanilla. Gradually beat in dry ingredients. Stir in grated chocolate and then add chocolate chips and chopped nuts. 
 5.     Roll or scoop dough into 2-inch sized balls (35 grams each) and place 2 inches apart on ungreased cookie sheet. Bake for 10-12 minutes. The cookies will look underdone, do not over bake.
 6.    Cool 2 minutes on baking sheet before transferring to a cooling rack. 
  
Makes 25 cookies. The scooped dough freezes well and bakes up as delicious as fresh. Add 1-2 minutes to bake time for frozen dough.

I forgot to do it this time, but it wouldn't be a bad idea to sprinkle a little kosher salt on each cookie ball before baking. It adds to the overall flavor; just don't go over board!

Enjoy! (: 

Wednesday, June 1, 2011

Going Green : Walnut Pesto and THE BEST Guacamole I've Ever Had

Today I would like to share with you guys two healthy dips and spreads that are heavy on the green, healthy fats and most importantly, the delicious factor.

First up, roasted tomatillo avocado guacamole!

All the purist out there may be shaking their heads because this guacamole is nearly half tomatillo and contains some other more non traditional ingredients; but for me, that's what attracted me to this recipe!

I found the recipe over at What's Gaby Cooking and just so happened to have perfectly ripe avocados from Costco just asking to be whipped into something delicious.
Roasted Tomatillo Guacamole
Only slightly adapted from What's Gaby Cooking

Ingredients
2 avocados, seeds and skin removed
zest and juice of 1 lime
2 small clove garlic
1 scant teaspoon kosher salt
1 tsp pepper
1 tsp honey
1/2 jalapeno, seeds removed
1/4 cup chopped cilantro
1/4 cup white onion, diced
6 medium Tomatillos, roasted (about 12 to 14 ounces)
Directions
  1. Preheat oven to 450 degrees.
  2. Remove the husks from the tomatillos. Rinse under warm water well and wipe clean. Cut the tomatillos in half and place into a baking pan. Drizzle with olive oil and roast for 15-20 minutes until they are tender. Remove and set aside to cool.
  3. Add all ingredients to a food processor and pulse for briefly so some chunks remain. 
***
The original recipe called for the guacamole to be turned into more of a puree in the food processor, but I've been raised on chunky guacamole. Texture is key! I don't want a homogenous mixture, I want little pops of flavor. Keeping it a bit on the chunky side (by only pulsing briefly) allows that.

I was excited to make some more of my microwaved tortilla chips to go along with the guacamole but I couldn't keep them coming out fast enough! This dip goes lightning fast.
My dad proclaimed that this was the best guacamole he has ever had. This is coming from a Texan that has had a lot of guacamoles in his lifetime! My mom said that it was "one of the best" but didn't want to commit to saying it was "the best". Psh. Scaredy cat.

The best thing about this guac? It never turns brown! I think it might be because of the large quantity of lime juice.
And since those Costco bags of avocados come in such humongous quantities, I actually made this guac a second time only days later because it was that good. It has tremendous amount of flavor! The zest of the lime really adds a good zing and the honey is oh-so faint but adds to the overall deliciousness.

This would be great for parties because 1) it doesn't brown, 2)it gets better with age so you could just let it chill out in the fridge for a bit, and 3) people would go CRAZY over it!
Oh and another plus would be that since it's bulked up by yummy roasted tomatillos, you get more guacamole for less money (since avocados = $$$).
The only downside I can think of is that you'd have to make twice the amount because it's going to go twice as fast!

You think I'm joking? I'm not.
Seriously. Just make this. Please.
Oh, but it's not my fault if you get addicted. Or is it? Oh well.
(:

My next green thing is a fabulous homemade walnut pesto.
I've never made a homemade pesto, and I certainly didn't know how easy it was!
 
The real reason that I wanted to make this was actually because I have become obsessed with adding walnuts to everything I make ever since I acquired a bag of them from Costco.
 
But, since I had already made enough desserts, quick breads, and yeast breads galore I wanted to go a more savory route.

This lead me to try finding sauces that used walnuts to add creaminess (usually found in sauces that are "vegan alternatives"). And though I saw a few using almonds, I could find none for walnuts.

I eventually came across this recipe over at Mind Over Batter. I liked that this pesto used walnuts instead of the more traditional pine nuts (which are much more expensive, anyway) and that it used a little less oil than other pesto recipes I saw.

The only thing I did differently was use a little less walnuts, but other than that I stayed true to the recipe.

Spinach Walnut Pesto
From Mind Over Batter
Ingredients
1 cup packed basil leaves
1 cup packed spinach leaves
1/2 cup finely chopped walnuts (I used about 1/2 cup walnut halves unchopped and toasted)
2-3 cloves garlic, minced or crushed
1 tsp. grated lemon zest
1 teaspoon of lemon juice
1/3 cup olive oil
1/2 cup grated parmesan cheese
1/3 – 1/2 teaspoon salt, or to taste (I ended up using 1/2 teaspoon)
Instructions
Place basil, spinach, walnuts, garlic cloves, lemon zest and lemon juice in the bowl of a food processor. Process until the basil and spinach has broken down a bit. With your food processor still running, slowly pour in the olive oil. Add parmesan cheese and process for about 7-10 more seconds. Stop the food processor and add salt to taste.

***
 It's really such beautiful and simple ingredients...
 Blended up and emulsified and BAM; I got pesto!
Who doesn't love pesto?!
I ended up stirring most of it into some whole wheat linguini pasta with chicken that I marinated in a sun-dried tomato vinaigrette.
Yum!! So flavorful and fresh. And speaking of sun dried tomato, adding a couple to this pasta dish would most definitely not hurt. It's an awesome match!
I served it with a spinach salad w/ Caesar dressing and steamed green beans.
So much green! 
Now that I've made homemade pesto, I don't think I'll ever go back to store bought ever again! I'll definitely be using this recipe, too. Walnuts are so much more accessible for me, and I love the little citrus zing from the lemon juice/zest. 
 
Next time I think I'll nix the spinach and go 100% basil. Basil has just so much more flavor; there's no point diluting it by using spinach! Also, I may experiment in substituting most of the oil for water or broth so to lower the overall fat content. Yes, I know its healthy fat, but with all the other ingredients, pesto can get pretty high up there in fat and I'd rather be able to use more of it!

What's your favorite homemade sauce?
I would love to get some more ideas!

Monday, May 30, 2011

Tilapia Dish #2: Macaroon Crusted Tilapia

Hey guys! It has been a crazy past couple of days. I graduated high school last Friday and had THE FUNNEST time at project graduation! (in case you don't know what that is, it is an all night party hosted by the school for all the seniors)
Me in my cap and gown.
 There was food galore (hello free Amy's ice cream and veggie burgers!), a bunch of fun prizes, a casino, photo booths, and a hypnotist, which had to be the CRAZIEST part. He hypnotized 10 of my classmates on stage and made (or should I say influenced?) them do the funniest things. If you stayed the whole night, you get a bunch of cash rewards, prizes, and a goodie bag...woo-hoo! I ended up getting home at 6 am , so I was dead tired, but it was still the best way to end my senior year!

I wanted to share with you all another favorite Tilapia recipe I have. (Tilapia dish #1 - here)

I usually don't remake dishes often. I see so many fun and excited dinner ideas that the ones I've already made will usually sit in my recipe book and remain untouched.

This dish, however, I have made three times. This is big! I never get tired of it, and neither does the rest of my family. This dish is most definitely a winner that takes seconds to prepare!

What is the dish? It's "macroon" crusted Tilapia. Tilapia filets are dredged in a mixture of coconut and almond and then seasoned with a kick of spice that takes it out of this world.


Macaroon Crusted Tilapia
Adapted from How Sweet It Is

4 Tilapia filets
1/2 cup raw almonds
1/3 cup unsweetened shredded coconut
1 egg white
Salt, pepper, and Old Bay seasoning (or other fish seasoning or cayenne pepper)

Preheat oven to 425 degrees.

In a food processor, process almonds and coconut until finely ground (make sure it doesn't start to "butterize", it helps if the almonds are straight from the freezer).

Lightly beat the egg white and place in a dish. Place the coconut/almond mixture in another dish.

Once by one, dip the Tilapia filet into the egg white and then into the breading. Place on a greased baking sheet.

Liberally season fish with salt, pepper, and Old Bay. Pat down the seasonings and place the fish into the hot oven for 20 to 25 minutes, or until the fish flakes easily with a fork and the crust is nicely toasted.

Serve with a wedge of lemon and a sweet sauce for dipping!
****
The almonds and the coconut get super toasty and flavorful; and since they're all unsweetened, they're just asking for a sweet and spicy sauce on the side.

We just happened to have a mango green apple habenero sauce in the fridge that worked perfectly for these, but if you don't have something like that laying around, a sauce made from orange marmalade or apricot jam would work perfectly! Basically, any sauce that would work with coconut shrimp will be fabulous with this.

In case you need a recipe, here is a super simple one to try out:
Homemade Sweet and Spicy Sauce-
1/2 cup orange marmalade or apricot jam
2 teaspoons dijon mustard
1 teaspoon prepared horseradish

Mix it all up and add salt and pepper if it needs it! I usually just eyeball the measurements for this sauce and it works out just fine.

The combination of the sweet sauce with the spicy and toasty fish is perfect! I would recommend not using sweetened coconut, since it's more moist and will tend to clump and not stick to the fish.

Here are pictures from all three times I've made this! (And a hit every time)
First time
The first time I made it, I went by the original recipe's directions and the result was an under seasoned fish. My new way of seasoning it (after breading) ensures flavor in each bite!
Second time-
This time I used frozen filets. They worked just as well and required no pre-planning at the grocery store. They thaw very quickly on the counter, or more safely in a water bath (just place the Tilapia filet still in it's package in room temperature water).
Flaky and devine...
The third time-
Obviously, I'm not too creative on what to pair with it (bread, steamed green vegetables and habenero mango sauce) but hey, if it works so well there's no point changin' it!

I used frozen fish again here, but this one was a little less higher quality (it was from Walmart...) so the fish started ripping when I was breading it and smelled a little...off. Still turned out fabulous thanks to this amazing combination of sweet and spicy with the coconut and almonds!

The best part is, it takes 5 minutes to put together and then another 20 minutes in the oven. In that 20 minutes, I can clean up, set the table, and steam the vegetables. No clean up afterwards and dinner is ready in a jiff!

Also, this meal doesn't taste like it took less than 30 minutes to put together; this is definitely a dish you can serve on a special occasion or to guests.

Vegetarian? I haven't tried this, but I wouldn't be surprised if this recipe worked fabulously with tofu as well.  
Fish too expensive? Chicken would be a great alternative!

Healthy, fast, and versatile? Yes please!

<3 Carlyn

Monday, May 23, 2011

Tilapia Ceviche and Low Fat Tortilla Chips

Tilapia is the go-to fish for my family. Its cheaper than others, freezes well, neutral taste (my mom doesn't like "fishy"), and is quite versatile!

I figured that since I've been showing nothing but baked goods lately, I might as well feature a couple savory recipes to keep you guys out of a sugar coma. :D

The first recipe I would like to show case is ceviche. My parents and I went to a restaurant a couple weeks ago called El Meson that serves interior Mexican food. As an appetizer, we got the fish ceviche which, at the time, I had never had before. The fact that the raw fish was primarily "cooked" in lime juice intrigued me, but nothing prepared me for the enormous amount of deliciousness I was about to consume.

Oh. My. God.

The bowl of ceviche came to our table filled with assorted vegetables and topped with freshly cut avocado. The fish was, of course, AH-mazing. I had to recreate this at home. HAD TO!

As soon as I could get my butt to the store I bought all of the ingredients needed to make it based on this recipes I found on Simple Recipes.

It suggested to let the fish sit in the marinade for a couple hours, but I chose to let it go overnight and I'm glad I did. It was practically bursting with flavor!
This recipe uses an even mix of lemon and lime juice to marinate the raw fish with tomato, red onion, a serrano chili, and seasonings. Then afterwards you top it off with avocado, olives (if you want), and cilantro. That's it! Simple ingredients that create something truly phenomenal.

Fish Ceviche
Adapted from Simple Recipes
Ingredients:
2 lbs any firm-fleshed fish, cut into 1/2 inch pieces, completely deboned
1/2 cup of fresh squeezed lime juice
1/2 cup of fresh squeezed lemon juice
1/2 red onion, finely diced
2 cups of chopped fresh seeded tomatoes
1 serrano chili, seeded and finely diced
2 teaspoons of salt
Dash of ground oregano
Dash of Tabasco or a light pinch of cayenne pepper
 
Cilantro
Sliced black olives
Avocado (I used one medium sized avocado for one batch of ceviche)
Baked tortilla chips

Directions-

In a non-reactive casserole dish, either Pyrex or ceramic, place the fish, onion, tomatoes, chili, salt, Tabasco, and oregano. Pour lime and lemon juice over mixture and gently mix. Cover the dish with plastic wrap and let it sit in the refrigerator for an hour, then stir, making sure more of the fish gets exposed to the acidic lime and lemon juices. Let sit overnight in the fridge.The fish should change from translucent to opaque during this time.

When ready to serve, add avocado, cilantro, and olives to mixture and gently mix so that the avocado is coated in the lemon/lime juice.

Serve with baked tortilla chips and dig in!
***

When I made this, I only used the original recipe's one cup of tomatoes, but I would increase it to 2 cups (as written in the above recipe) next time I make it (and there WILL BE a next time..)

I served the ceviche with baked tortilla chips and tortillas so we couple make tacos, but everyone agreed that the ceviche was much better transferred through chip form. Something about that combination of crunchy with zesty freshness was a real winner.
The tortilla chips were simply made by using Mission "extra thin" corn tortillas (extra thin=super crunchy)  that I cut into quarters. I sprayed them with an olive oil mister and seasoned them simply with kosher salt. Baked at 375 for about 10 minutes a side and you got yourself lower-fat tortilla chips perfect for ceviche dipping!
Uh yeah, we needed more chips. MUCH more. You honestly can't tell the difference between these and the fried variety!

It wasn't until a week or two later that I discovered a new trick for even lower fat tortilla chips! In fact NO added fat whatsoever!

I find that I can successfully make three tortillas worth of chips in one go in the microwave. All you do is place a paper towel on a large plate and arrange your quartered slices of corn tortillas evenly so that there is no overlap. Top liberally with salt or whatever seasonings you prefer and then cover with another set of paper towels. Yes, you need the paper towel on the bottom, otherwise it won't work and the chips will just be flimsy instead of crisp (it absorbs the moisture). The reason for liberal seasoning is because not all of it is going to stick, but most of it does which is a huge plus and the reason why there is no need for any added oil!

Place the plate in your microwave and heat for 2 minutes, check on them (the ones in the middle might be done, if so, remove them) and then keep on microwaving in 20 to 30 second intervals until they're all crisp.

These "burn" easily, but honestly the burnt ones taste just as delicious (just a slightly different flavor), so don't worry if you burned a batch. Mine are usually done at or before 2 minutes and 30 seconds, but I have a more powerful microwave.

Plus side? They taste JUST like the baked and fried versions but are much healthier, FASTER, and can be used for anything you would traditionally used the fried version for. Think tortilla chip crusted fish, nachos, chicken tortilla soup, etc
Cons? Only one- you can only make 12 chips at a time. Eh, I think I'll survive.

Anyway, back to the ceviche. The rest of the meal consisted of spinach salad but really, everyone just wanted the ceviche. And even though I ate copious amounts of it, I left the table feeling refreshed. The meal felt so light and FRESH! Definitely not a heavy meal. Loved it!

I would tell you how long the leftovers would last in the fridge, but to be honest with you, between the three of us we ate the whole batch in less than 24 hours. I kid you not, this stuff is amazing.

Have you ever made ceviche? And if so, what other vegetables do you like to add to the mix?
I wanted to add a bit more bulk to it so it wasn't just a whole bunch of fish, but I wasn't sure what else would work!