So it turns out I ran out of room to post pictures on the blog:P I was going to do a post today but will do it tomorrow once I purchase more space.And yes, it involves chocolate. :)
INSTEAD I'm working on a recipe's page that will hopefully be fully functional quite soon!
Night!
Monday, February 28, 2011
Sunday, February 27, 2011
In a breakfast rut?
Well hopefully this post will give you some fun ideas :D
Remember when I named my coconut lime banana bread as my favorite banana bread recipe? Well I take that back. Yes, it's definitely up there. I mean, hey, it's number two! But my number one is, for sure, my adaption of a banana cake recipe I found a while back. It has the classic flavors of bananas and chocolate chips, but you could always sub toasted chopped walnuts or any other nut for the chocolate chips. This is my favorite because it produces a light banana muffin with a wonderful caramelized flavor.
For topping:
2 Tbsp. turbinado sugar
1/4 tsp. ground cinnamon
In a small bowl, stir together the topping ingredients.


Remember when I named my coconut lime banana bread as my favorite banana bread recipe? Well I take that back. Yes, it's definitely up there. I mean, hey, it's number two! But my number one is, for sure, my adaption of a banana cake recipe I found a while back. It has the classic flavors of bananas and chocolate chips, but you could always sub toasted chopped walnuts or any other nut for the chocolate chips. This is my favorite because it produces a light banana muffin with a wonderful caramelized flavor.
"Caramelized" Whole Wheat Banana Muffins:
Ingredients:
3 very ripe bananas
2 large eggs
1 tsp. pure vanilla extract
1 ½ cups whole wheat pastry flour
1 tsp. baking soda
2 tsp. ground cinnamon
1/3-1/2 cup turbinado sugar (if using nuts, I would use 1/2 cup. If using chocolate chips, use 1/3)
1 ½ cups whole wheat pastry flour
1 tsp. baking soda
2 tsp. ground cinnamon
1/3-1/2 cup turbinado sugar (if using nuts, I would use 1/2 cup. If using chocolate chips, use 1/3)
1/3-1/2 cup dark chocolate chips or mini chocolate chips
For topping:
2 Tbsp. turbinado sugar
1/4 tsp. ground cinnamon
Directions:
Preheat the oven to 375 degrees Fahrenheit. Line a muffin tin with paper liners or spray with cooking spray.
In a microwave safe bowl, mash the bananas slightly. Microwave on high for a minute and half to two minutes. Add sugar and stir until some of the sugar dissolves. Place in freezer to cool while you prepare the rest of the ingredients.
In a bowl combine flour, cinnamon, chocolate chips, and baking soda.
Once banana mixture has cooled, add egg and vanilla extract. Combine this wet mixture with the dry mixture.
In a small bowl, stir together the topping ingredients.
Fill muffin tins with muffin batter and sprinkle with topping mixture.
Bake for 20 minutes, or until a toothpick inserted into the center comes out clean.

I've made these muffins many times and each time they come out smelling and tasting absolutely delicious!

They work really well using the silicone cups too.
These taste like they came straight from a bakery!
Got bananas that aren't ripe enough for muffins? No fear, make banana dogs!
This isn't so much a recipe, just a very very delicious idea :D

Take one hoagie roll or large hot dog bun and put it under the broiler to crisp up. Then, slather one side with crunchy PB and the other side with chocolate almond butter (or any other nut butter combo). Place your banana on there and then top with crunchy cocoa nibs and toasted coconut! YUM!!!
This seriously made my day. I couldn't get over how delicious this was! Crunchy and smooth textures all ova tha place! :D
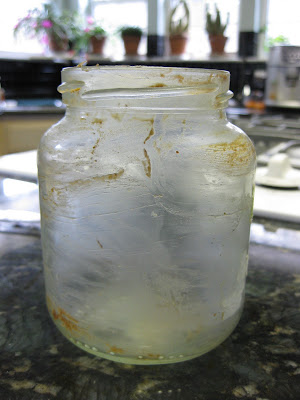
And what do you do when that certain homemade chocolate almond butter jar nears empty?

You make oats in a jar! This time I tried going for a chocolate orange theme.
In the mix-
-1/4 cup oatmeal + 1/2 cup water/almond breeze
-1 clementine
-half a banana
-orange marmalade
-orange and vanilla extract
-flaxseeds
-dollop of greek yogurt
aannddd half of a black bean brownie!

Best idea, ever.

Not the prettiest thing in the world but gosh darn tasty!!
The jar went from this:

To this, in a matter of minutes.

Go ahead, ask me if I liked it :P
No almost empty jar of nut butter around, but got oats on the brain? Then make lemon blueberry oats!

This baby was simple but so delicious. It was just basic oats with banana and flax seed mixed in. But I kicked it up a notch by adding lemon zest and lemon juice, and then a handful of blueberries in the final minutes of cooking just to soften them up a bit. Then I topped it with a dollop of homemade lemon curd and a couple fresh blueberries.

Obviously, the lemon blueberry combination in these oats was amazing, as is any lemon blueberry combination (also known as LB)
Okay, so you love lemon and blueberries, but maybe oats aren't your thing. Well do I have something for you!
Lemon Poppy Seed Pancakes!!

I used Holly's recipe over at Greek Yogurt and Apple Slices. I've been having the biggest craving for lemon poppy seed something (i.e muffins, pancakes, bread, etc) lately and just hadn't found any appealing recipes.
Well of course, until now! These pancakes are vegan, so easy to make, and obviously absolutely delicious!

For this batch, I didn't have almond milk so I just used buttermilk (not vegan) and omitted the vinegar. I shared the batch with my dad and we both loved them!! Pretty much everything a pancake should be, plus more. And an awesome ingredient list.
Blueberries aren't your thing? Well guess what- these pancakes are great with strawberries, too!
How do I know? I loved these so much I made another batch the next week with strawberries as a garnish instead of blueberries because strawberries are dirt cheap right now :D

This time, I made it just the way Holly intended, with Almond Breeze! I also added just a smidge more poppy seeds. If you don't have almond milk, both methods worked out great for me. So don't let that stop you from making these!
I had a dollop of greek yogurt on the side drizzled with a little maple syrup that tasted soo good with the lemony pancakes and the fresh, juicy strawberries.
 |
| drip, drip, drip.. |

Drool worthy; for sure. (:
Well, there you have it! A couple breakfast ideas if you're in a rut for something new and delicious to eat for the most important meal of the day :D
What's your favorite "special" breakfast?
PS- I connected each breakfast to the one before it with a common main ingredient. Aren't I just oh so clever? :P
Whole Wheat Fruit and Nut Yeast Bread
My dad and I love this particular loaf we got at Costco a while back that was studded with dried berries, crunchy grains, and almonds. We only got it once, though, because we haven't spotted it since!
I wanted to recreate that bread using one of my favorite whole grain bread recipes as a base. Instead of using my absolute favorite bread recipe as the base, I went with my second favorite because it utilizes an egg and applesauce to keep it nice and fluffy.
I didn't have any tried berries such as blueberries or cherries around, but I did have cranberries, golden raisins, and dates so I used those.
I also wasn't sure how much add-ins to use, but I think the bread really turned out well!
Fruit and Nut Bread:
1/2 cup bread flour
2 cups whole wheat flour
1/4 cup grains (I used a mixture of millet, whole flax seeds, and cracked wheat)
1/4 cup toasted almonds, roughly chopped
1/2 cup dried fruit (chopped if needed)
2/3 cup water
1/3 cup apple sauce
1 egg
2 tablespoons honey
1 teaspoons salt
11/2 teaspoons dry yeast
1.Place all ingredients into your bread machine on dough cycle.
2.Take out, place in greased loaf pan, cover with plastic wrap, and let rise for about an hour.
3. Sprinkle with raw sugar.
4.Bake at 350 for about 35 minutes. (You may have to cover with foil after 20 minutes if it starts looking too brown)
5. Remove from pan and transfer loaf to a cooling rack. Brush with butter for a glossy shine.
I decided to do something different with this bread that I haven't done before...I braided it!
 Okay..so you may be wondering what's up with that crack. What happened was that I didn't grease the loaf pan enough and it ended up sticking to the bottom. It was pretty much a disaster trying to get the loaf out and it nearly ripped in half. Grr! I wouldn't mind so much if it was just an aesthetic issue, but since it ripped while still piping hot, all of the moisture got out of it and the bread dried out :(
Anyways, back to the braid :D
 It was super simple and I think it really made the loaf quite pretty. All I did was separate the dough into three pieces and rolled them out into ropes. Then, I just braided them together and tucked the ends underneath the loaf.
 That piece on the cutting board isn't the prettiest because that's right were the rip was, but the rest of loaf looks great!
I love the little studs of raisin and cranberry. I think the dates were so soft that they just disintegrated into the loaf :P
 Holy. Yum.
I bet this would be great toasted, but I just enjoyed my fluffy piece straight up with some lemon curd :D I love the crunch of the nuts and the little bursts of fruity flavor.
 This one was a winner! Next time I really want to try doing pistachios instead of almonds and just craisins. Don't you love that pistachio cranberry combo? Oh, and next time, I'll try not to accidentally rip the loaf in half in the process of getting it out of the pan:P
I wanted to recreate that bread using one of my favorite whole grain bread recipes as a base. Instead of using my absolute favorite bread recipe as the base, I went with my second favorite because it utilizes an egg and applesauce to keep it nice and fluffy.
I didn't have any tried berries such as blueberries or cherries around, but I did have cranberries, golden raisins, and dates so I used those.
I also wasn't sure how much add-ins to use, but I think the bread really turned out well!
Fruit and Nut Bread:
1/2 cup bread flour
2 cups whole wheat flour
1/4 cup grains (I used a mixture of millet, whole flax seeds, and cracked wheat)
1/4 cup toasted almonds, roughly chopped
1/2 cup dried fruit (chopped if needed)
2/3 cup water
1/3 cup apple sauce
1 egg
2 tablespoons honey
1 teaspoons salt
11/2 teaspoons dry yeast
1.Place all ingredients into your bread machine on dough cycle.
2.Take out, place in greased loaf pan, cover with plastic wrap, and let rise for about an hour.
3. Sprinkle with raw sugar.
4.Bake at 350 for about 35 minutes. (You may have to cover with foil after 20 minutes if it starts looking too brown)
5. Remove from pan and transfer loaf to a cooling rack. Brush with butter for a glossy shine.
I decided to do something different with this bread that I haven't done before...I braided it!

Anyways, back to the braid :D


I love the little studs of raisin and cranberry. I think the dates were so soft that they just disintegrated into the loaf :P

I bet this would be great toasted, but I just enjoyed my fluffy piece straight up with some lemon curd :D I love the crunch of the nuts and the little bursts of fruity flavor.

Saturday, February 26, 2011
White Bean Blondie #2
I told you guys that I was going to try making those bean blondies again and I wasn't kidding! I couldn't even wait till the old batch was gone before I started on a new batch because I really wanted to make em right.
I made a half batch because I have way too many other fun desserts I want to try...you should see my bookmarks; it's insane!
And this time I scooped my flour instead of weighing it. I decided to see the difference between the two, so I weighed the flour that I scooped. Turns out it was off by 18 grams which is a little over two tablespoons (if I made the full batch, though, it would be off by almost 1/3 cup!) It really does matter whether the person who wrote the recipe intended for the ingredients to be weighed or measured because it can really change the outcome sometimes.
Other changes I made was that I used chocolate chips instead of cocoa nibs, and pecans instead of macadamia nuts. I also used half the rum called for and subbed the other half with water.
 Success! The bars were the bomb and everything was much more balanced. Even still, I think they could probably use even more flour to give them some more structure. Or maybe I should just bake them longer?
I took so many tantalizing pictures that I couldn't decide which ones to show y'all, so I'm showing them all!


 And the best part? My first bite out of one of these babies was gorgeous..
 Look at that chocolate chip peaking out! :D
I knew adding chocolate chips would be a good idea (:
This time the rum flavor was just right and I loved the contrast of the chocolate chips. The combo of the smoothness with the crunch of the pecans is just out of this world :D
Here's the recipe
Happy baking! <3
I made a half batch because I have way too many other fun desserts I want to try...you should see my bookmarks; it's insane!
And this time I scooped my flour instead of weighing it. I decided to see the difference between the two, so I weighed the flour that I scooped. Turns out it was off by 18 grams which is a little over two tablespoons (if I made the full batch, though, it would be off by almost 1/3 cup!) It really does matter whether the person who wrote the recipe intended for the ingredients to be weighed or measured because it can really change the outcome sometimes.
Other changes I made was that I used chocolate chips instead of cocoa nibs, and pecans instead of macadamia nuts. I also used half the rum called for and subbed the other half with water.

I took so many tantalizing pictures that I couldn't decide which ones to show y'all, so I'm showing them all!


 |
| chomp. |
This time the rum flavor was just right and I loved the contrast of the chocolate chips. The combo of the smoothness with the crunch of the pecans is just out of this world :D
Here's the recipe
Happy baking! <3
Thursday, February 24, 2011
Why not...
make jalapeno cheese bread with whole wheat flour? It seems like there's such a variety of healthified bread recipes out there but I never see this particular combo. To make sure, I did an extensive search on the internet for a whole wheat jalapeno bread and came up with nothing...nothing! I found one that had a smidge of whole wheat flour, but that was about it.
However, during my extensive search, I was able to compile ideas and approximate measures of the essential ingredients so I decided I would just make my own.
 ...That was just a quick sneak-peak to encourage you to keep reading ;)
I used my favorite whole wheat bread recipe as a base. I wanted to have a Mexican flare, so I added some cumin and fresh cilantro. We had a huge jar of pickled jalapenos, so that's what I used, but fresh jalapenos would probably be better.
Whole Wheat Jalapeno Cheese Bread
1 1/3 cups lukewarm water
2 1/2 teaspoons instant yeast
4 cups white whole wheat flour
1 1/2 tablespoons vital wheat gluten
3 tablespoons olive oil
3 cloves of garlic, thinly sliced
2 1/2 tablespoons honey
1/4 cup roughly chopped pickled jalapeno slices
2 teaspoons cumin
1 teaspoon freshly ground black pepper
1/3 cup chopped fresh cilantro (packed)
1 1/2 teaspoons salt
1 cup shredded cheese (I used lower fat Mexican blend)
1/4 cup (packed) pickled jalapeno slices + more for topping
egg wash
Directions:
1) Place oil in a small skillet. Add garlic slices and heat on medium-low until garlic is golden (but not burnt) about 5-10 minutes. Set aside and let cool.
2) Place all ingredients (including oil/garlic mixture) in order of the ingredient list into your bread maker except the cheese and 1/4 cup sliced jalapenos. Set on dough cycle.
3) Remove dough and separate into two balls. Roll each dough ball into a rectangle and sprinkle with 1/2 cup of cheese each. Evenly spread out 2 tablespoons of the jalapeno slices onto each rectangle. Roll the rectangle up (from the long end) and tuck the open ends underneath the roll. Pinch all seams closed.
4) Place rolls onto a baking sheet sprinkled with cornmeal, cover with plastic wrap sprayed with cooking spray, and let rise for about 45 minutes.
5) After it looks good and ready, brush with an egg wash and garnish with a couple jalapeno slices. Sprinkle a little bit more cheese on and bake at 400 until it starts looking golden. Lower the heat to 350 and bake until the internal temperature reaches above 200 degrees. Mine took 30 minutes total in the oven.
Makes two small loaves.
***
Ready to see some pictures?!

 Dinner was ready right as these loaves were coming out, so the loaf we ate didn't get much time to cool before we sliced into it. I was worried there might be a cheese explosion since it was still quite hot, but luckily I didn't add too much cheese for that. I also used low fat cheese (because that's what we had on hand) so it doesn't melt as well as full fat.
We had the bread along side grilled pork chops and steamed snap peas.
 Look at that lovely swirl! :D
 Ohmygoshsoyummy.
The garlic basically disappeared inside this bread but contributed great roasted flavor alongside the other herbs and spices like the cumin, black pepper, and cilantro. This had a GREAT heat but wasn't too spicy; just perfect!
I seriously could not stop thinking about this bread...
A couple notes:
-This can most definitely be made with any cheese you have laying around, but do not use non fat.
-If you use fresh jalapenos, keep in mind that the proportions might be completely different and you may have to reference a different recipe to get your measurements.
-If you want to make this easier, just add 1 cup cubed (not shredded) cheese into the bread machine along with the 1/4 cup sliced jalapenos and don't roll it out. Just shape it into a loaf and continue on with the rest of the directions.
PLEASE try this out and tell me what you think! Its really not as complicated as it looks.
***
In other news, I've been experimenting using pureed beans in desserts lately. You've already seen the magnificent dessert hummus that tastes like cookie dough, but I've also been trying the bean thing out in brownies!
First, I attempted to make black bean brownies. I've heard of black bean brownies all over the web, and have even made some before (with spinach, it was eh) but after I saw these brownies over at Happy Herbivore, I knew I had to try making some again.
I was feeling adventurous so I wanted to change up the recipe a bit...
Black Bean Brownies
15 ounces black beans, drained and rinsed
2 whole bananas (I used 1 1/2 and added one egg)
⅓ cup agave nectar (I used a mixture of maple syrup and brown rice syrup)
¼ cup unsweetened cocoa
1 tbsp cinnamon
1 tsp vanilla extract
¼ cup raw sugar (optional) (I ended up adding just one tablespoon)
¼ cup instant oats (added 2 tablespoons whole wheat pastry flour instead)
Okay, so I know that is a lot of random changes but here is my reasoning why. Some people said the banana flavor was too prominent and I usually see eggs in brownie recipes so I decided to swap half a banana for one. The reason why I did flour instead of whole oats is because I didn't want chunks of chewy oats in a smooth brownie. I used less flour because I used an egg so I figured I could use less. Seeing as I do not know how to make recipes, these swaps were probably not a good idea, but I love to experiment!
Here's the directions-
Preheat oven to 350 F. Grease an 8x8" pan and set aside. Combine all ingredients, except oats, in a food processor or blender and blend until smooth, scrapping sides as needed. Stir in the oats and pour batter into the pan. Bake approximately 30 minutes or until a toothpick inserted in the center comes out clean. Allow to cool before slicing.
***
I love how fast these come together!
Oh, and I also added some cookie dough hummus dip to the batter when it was in the pan and swirled it around with a knife. After they were completely cooled, I frosted it with the leftover vegan chocolate frosting from my valentines cake.
 That light chunk in the brownie is the cookie dough dip!
Okay so the verdict?
Hm. I don't know. I made a lot of changes so I obviously can't say anything about the original recipe but I can say that the banana flavor was still a little to prominent. The cinnamon only accentuated the banana flavor even more so I probably wouldn't add any next time and instead add some instant coffee. These were pretty fudgy, which they're supposed to be, but it could probably use some more flour.
Other than that, I really enjoyed these brownies. They won't replace my go-to brownie recipe, but I think I will make these again with my changes.
My dad and I liked them, but my sister and my mom thought they were a little "weird".
The other bean related dessert I made? White bean blondies! Hey, I figured if I did brownies, I got to do blondies :D
I followed this recipe that I found over at No Meat Athlete that looked quite promising.
Since the black bean brownies turned out pretty fudgy, I wanted to make a recipe that used some more flour to give it more structure. Here's Christine's recipe:
Vegan White Bean Blondies-
1 1/2 cups whole wheat pastry flour
1 1/2 tsp salt
1 tsp baking powder
1 cup packed brown sugar
1 15 oz can or 2 cups cooked white beans
1 cup or about 10 large chopped dates
1/4 cup dark rum, such as Myers's
1 tbsp apple cider vinegar
1 cup water
1 cup chopped macadamia nuts
1/2 cup cacao nibs
Preheat the oven to 350 degrees.
Combine the flour, salt, baking powder, and brown sugar; set aside.
Rinse and drain the can of beans. Process in a food processor with the chopped dates and rum. Add the water and vinegar and process until a smooth puree forms.
Fold the bean puree into the dry ingredients. Stir in the macadamia nuts and cacao nibs.
Grease a 9×13 baking dish with baking spray and spread the batter evenly into the pan. Bake for about 25-30 minutes, turning the pan around in the oven halfway through. A knife stuck in the center should come out clean. Mine took 28 minutes to get nice and brown along the edges and golden on top.
Let cool, then slice into 24 squares.
I followed this recipe exactly, even down to the rum! In fact, I was scouring the web, trying to find a sub for rum, but it turns out we actually had some that I used for tiramisu a while back..score! This way I could get the exact flavor she was aiming for.
However, when I tried one, the rum flavor was WAY too strong, and they were kind of too fudgy and flat compared to Christine's pictures. After trouble shooting with her, I figured out that it was probably because I didn't add enough flour. I weighed my flour but she scooped hers, so that was probably where the difference lied. They still taste good! Just too rummy..
I am SO making these again, though! I really want to get them right because they are seriously such a promising recipe that I know will turn out awesome with a little less rum and more flour. I might not use cocoa nibs next time, though, and use chocolate chips instead. They seemed to get kind of lost and I couldn't taste them.
I also love how this recipe uses whole wheat flour, pureed dates instead of some of the sugar, beans instead of butter/oil, and vegan to boot! (not if I use chocolate chips though)
 I can tell these need more flour just by comparing them to the pictures on the recipe's page.
 I would really suggest going over to No Meat Athlete and checking out this recipe, y'all..just don't weigh your flour!! I swear, this is a good one. I need to make these again really soon to redeem myself :P
I sure hope my parents don't mind even more bean desserts:D I already have my eye on a delicious look black bean brownie recipe that looks like the brownie came straight from a bakery...
Whats you're favorite "hidden" healthy dessert?
However, during my extensive search, I was able to compile ideas and approximate measures of the essential ingredients so I decided I would just make my own.

I used my favorite whole wheat bread recipe as a base. I wanted to have a Mexican flare, so I added some cumin and fresh cilantro. We had a huge jar of pickled jalapenos, so that's what I used, but fresh jalapenos would probably be better.
Whole Wheat Jalapeno Cheese Bread
1 1/3 cups lukewarm water
2 1/2 teaspoons instant yeast
4 cups white whole wheat flour
1 1/2 tablespoons vital wheat gluten
3 tablespoons olive oil
3 cloves of garlic, thinly sliced
2 1/2 tablespoons honey
1/4 cup roughly chopped pickled jalapeno slices
2 teaspoons cumin
1 teaspoon freshly ground black pepper
1/3 cup chopped fresh cilantro (packed)
1 1/2 teaspoons salt
1 cup shredded cheese (I used lower fat Mexican blend)
1/4 cup (packed) pickled jalapeno slices + more for topping
egg wash
Directions:
1) Place oil in a small skillet. Add garlic slices and heat on medium-low until garlic is golden (but not burnt) about 5-10 minutes. Set aside and let cool.
2) Place all ingredients (including oil/garlic mixture) in order of the ingredient list into your bread maker except the cheese and 1/4 cup sliced jalapenos. Set on dough cycle.
3) Remove dough and separate into two balls. Roll each dough ball into a rectangle and sprinkle with 1/2 cup of cheese each. Evenly spread out 2 tablespoons of the jalapeno slices onto each rectangle. Roll the rectangle up (from the long end) and tuck the open ends underneath the roll. Pinch all seams closed.
4) Place rolls onto a baking sheet sprinkled with cornmeal, cover with plastic wrap sprayed with cooking spray, and let rise for about 45 minutes.
5) After it looks good and ready, brush with an egg wash and garnish with a couple jalapeno slices. Sprinkle a little bit more cheese on and bake at 400 until it starts looking golden. Lower the heat to 350 and bake until the internal temperature reaches above 200 degrees. Mine took 30 minutes total in the oven.
Makes two small loaves.
***
Ready to see some pictures?!

 |
| don't you love the tan spots? |

We had the bread along side grilled pork chops and steamed snap peas.


The garlic basically disappeared inside this bread but contributed great roasted flavor alongside the other herbs and spices like the cumin, black pepper, and cilantro. This had a GREAT heat but wasn't too spicy; just perfect!
I seriously could not stop thinking about this bread...
A couple notes:
-This can most definitely be made with any cheese you have laying around, but do not use non fat.
-If you use fresh jalapenos, keep in mind that the proportions might be completely different and you may have to reference a different recipe to get your measurements.
-If you want to make this easier, just add 1 cup cubed (not shredded) cheese into the bread machine along with the 1/4 cup sliced jalapenos and don't roll it out. Just shape it into a loaf and continue on with the rest of the directions.
PLEASE try this out and tell me what you think! Its really not as complicated as it looks.
***
In other news, I've been experimenting using pureed beans in desserts lately. You've already seen the magnificent dessert hummus that tastes like cookie dough, but I've also been trying the bean thing out in brownies!
First, I attempted to make black bean brownies. I've heard of black bean brownies all over the web, and have even made some before (with spinach, it was eh) but after I saw these brownies over at Happy Herbivore, I knew I had to try making some again.
I was feeling adventurous so I wanted to change up the recipe a bit...
Black Bean Brownies
15 ounces black beans, drained and rinsed
2 whole bananas (I used 1 1/2 and added one egg)
⅓ cup agave nectar (I used a mixture of maple syrup and brown rice syrup)
¼ cup unsweetened cocoa
1 tbsp cinnamon
1 tsp vanilla extract
¼ cup raw sugar (optional) (I ended up adding just one tablespoon)
¼ cup instant oats (added 2 tablespoons whole wheat pastry flour instead)
Okay, so I know that is a lot of random changes but here is my reasoning why. Some people said the banana flavor was too prominent and I usually see eggs in brownie recipes so I decided to swap half a banana for one. The reason why I did flour instead of whole oats is because I didn't want chunks of chewy oats in a smooth brownie. I used less flour because I used an egg so I figured I could use less. Seeing as I do not know how to make recipes, these swaps were probably not a good idea, but I love to experiment!
Here's the directions-
Preheat oven to 350 F. Grease an 8x8" pan and set aside. Combine all ingredients, except oats, in a food processor or blender and blend until smooth, scrapping sides as needed. Stir in the oats and pour batter into the pan. Bake approximately 30 minutes or until a toothpick inserted in the center comes out clean. Allow to cool before slicing.
***
I love how fast these come together!
Oh, and I also added some cookie dough hummus dip to the batter when it was in the pan and swirled it around with a knife. After they were completely cooled, I frosted it with the leftover vegan chocolate frosting from my valentines cake.

Okay so the verdict?
Hm. I don't know. I made a lot of changes so I obviously can't say anything about the original recipe but I can say that the banana flavor was still a little to prominent. The cinnamon only accentuated the banana flavor even more so I probably wouldn't add any next time and instead add some instant coffee. These were pretty fudgy, which they're supposed to be, but it could probably use some more flour.
Other than that, I really enjoyed these brownies. They won't replace my go-to brownie recipe, but I think I will make these again with my changes.
My dad and I liked them, but my sister and my mom thought they were a little "weird".
The other bean related dessert I made? White bean blondies! Hey, I figured if I did brownies, I got to do blondies :D
I followed this recipe that I found over at No Meat Athlete that looked quite promising.
Since the black bean brownies turned out pretty fudgy, I wanted to make a recipe that used some more flour to give it more structure. Here's Christine's recipe:
Vegan White Bean Blondies-
1 1/2 cups whole wheat pastry flour
1 1/2 tsp salt
1 tsp baking powder
1 cup packed brown sugar
1 15 oz can or 2 cups cooked white beans
1 cup or about 10 large chopped dates
1/4 cup dark rum, such as Myers's
1 tbsp apple cider vinegar
1 cup water
1 cup chopped macadamia nuts
1/2 cup cacao nibs
Preheat the oven to 350 degrees.
Combine the flour, salt, baking powder, and brown sugar; set aside.
Rinse and drain the can of beans. Process in a food processor with the chopped dates and rum. Add the water and vinegar and process until a smooth puree forms.
Fold the bean puree into the dry ingredients. Stir in the macadamia nuts and cacao nibs.
Grease a 9×13 baking dish with baking spray and spread the batter evenly into the pan. Bake for about 25-30 minutes, turning the pan around in the oven halfway through. A knife stuck in the center should come out clean. Mine took 28 minutes to get nice and brown along the edges and golden on top.
Let cool, then slice into 24 squares.
I followed this recipe exactly, even down to the rum! In fact, I was scouring the web, trying to find a sub for rum, but it turns out we actually had some that I used for tiramisu a while back..score! This way I could get the exact flavor she was aiming for.
However, when I tried one, the rum flavor was WAY too strong, and they were kind of too fudgy and flat compared to Christine's pictures. After trouble shooting with her, I figured out that it was probably because I didn't add enough flour. I weighed my flour but she scooped hers, so that was probably where the difference lied. They still taste good! Just too rummy..
I am SO making these again, though! I really want to get them right because they are seriously such a promising recipe that I know will turn out awesome with a little less rum and more flour. I might not use cocoa nibs next time, though, and use chocolate chips instead. They seemed to get kind of lost and I couldn't taste them.
I also love how this recipe uses whole wheat flour, pureed dates instead of some of the sugar, beans instead of butter/oil, and vegan to boot! (not if I use chocolate chips though)

 |

I sure hope my parents don't mind even more bean desserts:D I already have my eye on a delicious look black bean brownie recipe that looks like the brownie came straight from a bakery...
Whats you're favorite "hidden" healthy dessert?
Monday, February 21, 2011
Cookie Dough Dip! (You gotta read this)
I found this AH-MAZ-ING dip recipe over at The Wannabe Chef that was just calling my name.
When someone says "Peanut Butter Chocolate Chip Dessert Hummus" they may get weird looks from the majority of the people around them but I've heard of dessert hummus before, so its not a completely knew concept. The problem is that I have only attempted to make dessert hummus once before and it ended up tasting so-so (not horrible, but I admit, half of it went into the trash because it was getting old sitting in the fridge..).
HOWEVER, this particular recipe had people saying it tasted JUST like cookie dough. Cookie dough? I mean come on let's not go over board...I was definitely a skeptic.
I made the dip regardless and was amazed by the outcome. Y'ALL IT TASTES JUST LIKE COOKIE DOUGH! Okay, so maybe not "just" but pretty dang close!
 Looks like it too!
I slightly adapted the recipe for using one 15 ounce can of chickpeas (which is 1 1/2 cups instead of 2 cups, like Evan's recipe). The proportions are the same except for the vanilla, which I kept the same despite the drop of the other ingredients, and just a slight less amount of maple syrup.
Cookie Dough Dip
1 (15 ounce can) chickpeas, drained and rinsed
3 tablespoons peanut butter (or other nut butter)
1/4 maple syrup
1 1/2 teaspoons vanilla
3 tablespoons chocolate chips
Evan recommends removing the skins of the chickpeas for the smoothest texture, but I decided to keep them on out of sheer laziness and also because I think the skin probably holds some nutrition. Indeed my dip wasn't super smooth, but it was barely noticeable. Also, I used dark chocolate chips, which is highly recommended :D
Blend the first 4 ingredients in a food processor until it's as smooth as it will get. Remove mixture and put into a serving bowl. Fold in chocolate chips and serve! Makes 1 1/2 cups.
I like mine the best plain or with pretzels but its also great with (organic) graham crackers:
 These ones aren't homemade, but I did get them on sale for half their normal price!! (which, when half off, is the same price as non organic normally..)
Get in my belly :D
And also great with carrots!

 That surprising burst of chocolate is absolutely to die for.
I made another batch for my friend whom I know would love something like this. However for this batch I made it with sunflower seed butter instead of peanut butter because she's allergic. I also used mini chocolate chips as opposed to normal sized because I thought it would make the chocolate flavor more evenly dispersed. Turns out I like the bigger chips better! That way the chocolate flavor doesn't get lost and you can get one big bite of chocolate instead of miniature bites.
Also, I think that normal peanut butter (I used Skippy Natural) will work better in this than homemade. Granted I haven't tried making the dip with a homemade nut butter but I think that real intense flavor is needed.
And I decided to calculate the nutritional information so I could compare it to hummus and peanut butter itself.
1 (2 tablespoon serving) made with peanut butter:
Calories: 115
Fat: 5.4 grams
Fiber: 1 gram
Sugar: 7 grams
Protein: 3.4 grams
Not too shabby! 7 grams of sugar for something that tastes like cookie dough is really not bad at all (and comparatively is the same to most commercial peanut butters). Its also great to know that almost all of that fat is the good kind of fat from the peanut butter :D
Now, my nutritional analysis is from the products I used in my dip and might vary depending on the nut butter or even the can of chickpeas you use (I've noticed that varying brands of chickpeas will have varying nutritional labels although you'd think they would all be the same!).
In fact, if you use SunButter instead of peanut butter you'll be adding .4 grams of fiber to each serving!
I can't wait to come up with different variations for this base recipe. Like, what if instead of chocolate chips- raisins and some cooked oatmeal so it would be kind of like a oatmeal raisin cookie. Or chocolate almond butter and coconut flakes. Or white chocolate chips instead of dark! Oo! Maybe cocoa nibs, too! (Can you tell I'm getting excited?)
Don't blame me if you get addicted to this stuff, y'all. It just might happen.
Thanks Evan for the fabulous recipe!!
<3 Night!
When someone says "Peanut Butter Chocolate Chip Dessert Hummus" they may get weird looks from the majority of the people around them but I've heard of dessert hummus before, so its not a completely knew concept. The problem is that I have only attempted to make dessert hummus once before and it ended up tasting so-so (not horrible, but I admit, half of it went into the trash because it was getting old sitting in the fridge..).
HOWEVER, this particular recipe had people saying it tasted JUST like cookie dough. Cookie dough? I mean come on let's not go over board...I was definitely a skeptic.
I made the dip regardless and was amazed by the outcome. Y'ALL IT TASTES JUST LIKE COOKIE DOUGH! Okay, so maybe not "just" but pretty dang close!

I slightly adapted the recipe for using one 15 ounce can of chickpeas (which is 1 1/2 cups instead of 2 cups, like Evan's recipe). The proportions are the same except for the vanilla, which I kept the same despite the drop of the other ingredients, and just a slight less amount of maple syrup.
Cookie Dough Dip
1 (15 ounce can) chickpeas, drained and rinsed
3 tablespoons peanut butter (or other nut butter)
1/4 maple syrup
1 1/2 teaspoons vanilla
3 tablespoons chocolate chips
Evan recommends removing the skins of the chickpeas for the smoothest texture, but I decided to keep them on out of sheer laziness and also because I think the skin probably holds some nutrition. Indeed my dip wasn't super smooth, but it was barely noticeable. Also, I used dark chocolate chips, which is highly recommended :D
Blend the first 4 ingredients in a food processor until it's as smooth as it will get. Remove mixture and put into a serving bowl. Fold in chocolate chips and serve! Makes 1 1/2 cups.
I like mine the best plain or with pretzels but its also great with (organic) graham crackers:

Get in my belly :D
 |
| Nom nom nom. |


I made another batch for my friend whom I know would love something like this. However for this batch I made it with sunflower seed butter instead of peanut butter because she's allergic. I also used mini chocolate chips as opposed to normal sized because I thought it would make the chocolate flavor more evenly dispersed. Turns out I like the bigger chips better! That way the chocolate flavor doesn't get lost and you can get one big bite of chocolate instead of miniature bites.
Also, I think that normal peanut butter (I used Skippy Natural) will work better in this than homemade. Granted I haven't tried making the dip with a homemade nut butter but I think that real intense flavor is needed.
And I decided to calculate the nutritional information so I could compare it to hummus and peanut butter itself.
1 (2 tablespoon serving) made with peanut butter:
Calories: 115
Fat: 5.4 grams
Fiber: 1 gram
Sugar: 7 grams
Protein: 3.4 grams
Not too shabby! 7 grams of sugar for something that tastes like cookie dough is really not bad at all (and comparatively is the same to most commercial peanut butters). Its also great to know that almost all of that fat is the good kind of fat from the peanut butter :D
Now, my nutritional analysis is from the products I used in my dip and might vary depending on the nut butter or even the can of chickpeas you use (I've noticed that varying brands of chickpeas will have varying nutritional labels although you'd think they would all be the same!).
In fact, if you use SunButter instead of peanut butter you'll be adding .4 grams of fiber to each serving!
I can't wait to come up with different variations for this base recipe. Like, what if instead of chocolate chips- raisins and some cooked oatmeal so it would be kind of like a oatmeal raisin cookie. Or chocolate almond butter and coconut flakes. Or white chocolate chips instead of dark! Oo! Maybe cocoa nibs, too! (Can you tell I'm getting excited?)
Don't blame me if you get addicted to this stuff, y'all. It just might happen.
Thanks Evan for the fabulous recipe!!
<3 Night!
Friday, February 18, 2011
The Savory
Yesterday, I was all about the sweets but today, it is all about savory meals.
First up- how to transform leftovers.
On Valentines day, my mom cooked up steak that we got at Costco. Obviously, the Costco packages are huge so we had more than enough to go around. On the side we had a warm spinach and green bean salad with feta made by me plus a simple baked potato.
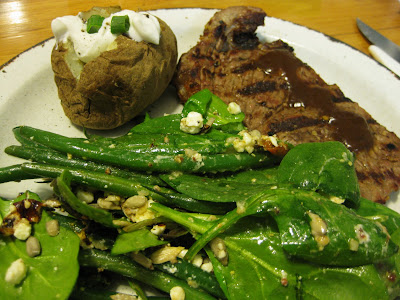 I haven't had a plain ol' baked potato in so long! I topped it with Greek yogurt, seasonings, Brummel & brown butter, and green onion.
We had two and a half huge steaks leftover so I made Philly cheese steak sandwiches. For five sandwiches I used a quarter of a huge onion, one red bell pepper, a bunch of mushrooms, one slice of provolone cheese for each sandwich, and 1 1/2 (huge) steaks.
I sauteed the sliced veggies in olive oil with a dash of oregano and salt/pepper and then added thinly sliced steak at the end to brown just a bit. I broiled wheat hoagie rolls in the oven to give them a quick toast, put all the toppings on, placed a slice of cheese on top, and broiled again until all the cheese had melted.
Topped with a couple dabs of ketchup!
 Yummy!! We really extended the amount of beef because I used a bunch of vegetables. The flavors are so simple but when combined they created magic! I could probably have this sub 5 days in a row and not get tired of it..and that's saying something.
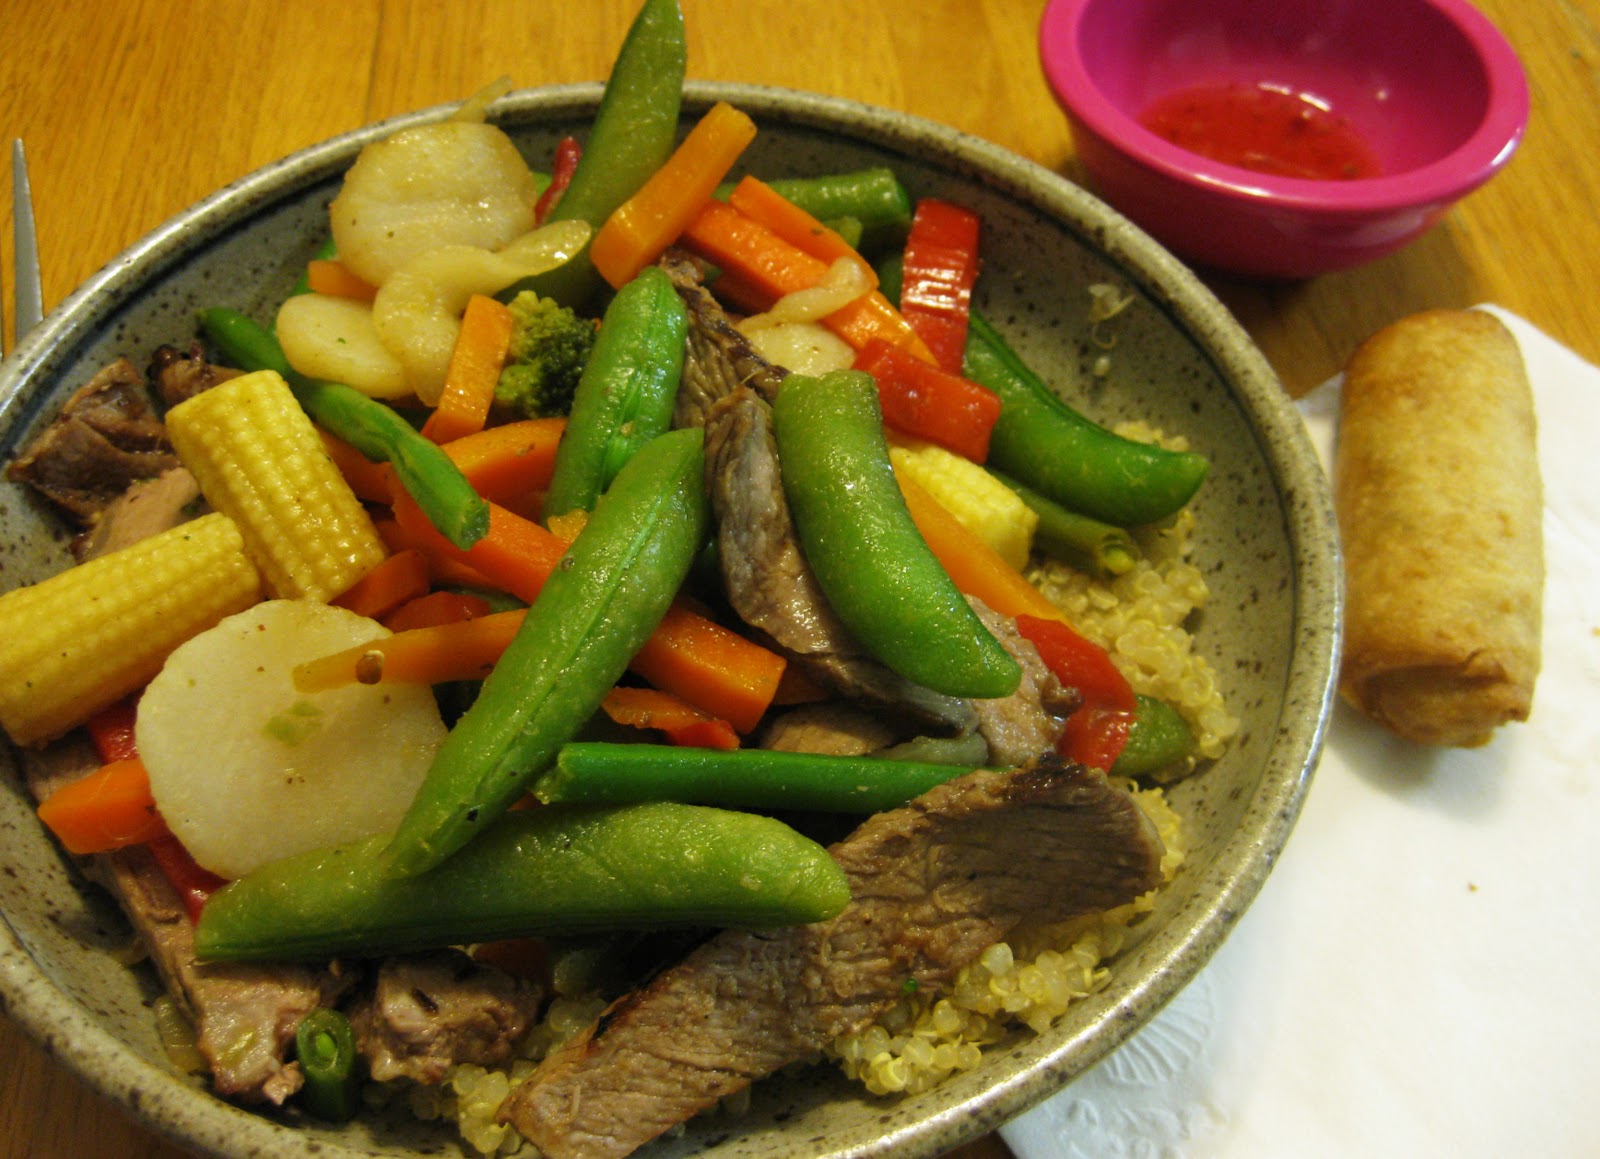
The last huge steak was utilized in yet another veggie stir fry.
 Served on top of quinoa, with a couple vegetable egg rolls on the side (from Costco!) If you're wondering how to do an easy stir fry, this post might help.
We got three great, completely different meals out of one package of beef! I love utilizing leftovers :D
***
Speaking of leftovers, remember when I bought that huge package of fresh mozzarella at Costco for my tomato and mozzarella bruschetta? Well I've been utilizing that too!
First, I got the bright idea to make a margherita style pizza for lunch using a whole wheat pita as the base.
 I put the pita in the oven as it was heating up (set to broil) while I prepared the rest of the ingredients. This way it would be crispy despite all of the moist ingredients. Topped with pesto as the base, a lot of fresh mozzarella (maybe too much?), tomato slices, salt, and pepper. I put it back in the oven for a couple minutes and BAM.
 In less than 10 minutes I had delicious, oozing goodness for lunch..on a school day!
Cut into four for maximum eatability-
 Oh yes. Absolutely amazing.
 I would pay big bucks for this at a restaurant :D
The second way I utilized the fresh mozzarella was in Tofu Parmesan!!
My mom and I were in a rut as to what to eat for dinner when I remembered that we had a block of tofu in the fridge. Since she was averse to eating it just by itself (like baked tofu, or something) I went to the internet for tofu ideas. This recipe was number one on All Recipe's top tofu recipes so I knew it had to be good!
I used the recipe as a guide, but didn't really follow its directions.
Here's my adaption:
Ingredients-
1/2 cup whole wheat Italian bread crumbs
5 tablespoons Parmesan cheese, divided
2 teaspoons dried oregano, divided
salt and pepper to taste
1 egg, well beaten
1 (14 ounce) block firm tofu
1 cup tomato sauce
1/2 teaspoon dried basil
1 clove garlic
4 ounces shredded mozzarella cheese (or fresh, if you got it!)
Directions-
In a small bowl, combine bread crumbs, 2 tablespoons Parmesan cheese, 1 teaspoon oregano, salt, and black pepper.
Press tofu for 15 minutes or more to get some of the water out. Slice (knife parallel to shorter end) into 16 slices that will be around 1/4 inch thick.
Dip tofu slices into egg mixture, and then into bread crumb mixture and place on a well greased cookie sheet. Spray the slices with additional cooking spray.
Bake at 375 for 20 minutes or until golden and crisped, flipping half way through.
Combine tomato sauce, basil, garlic, and remaining oregano. Place a thin layer of sauce in an 8 inch square baking pan. Arrange 8 tofu slices in one layer in the pan. Spoon half of remaining sauce over tofu, top with remaining 8 slices of tofu (this time rotate the slices so they are perpendicular to the first layer's slices).
Top with the rest of the sauce, mozzarella, and remaining 3 tablespoons Parmesan.
Bake at 400 for 20 minutes.
 My directions are kind of exact, but this is how I got a really, really good Tofu Parmesan so I think it's best I share what I did exactly. Between the three of us, we ate the whole thing. The breaded tofu tastes SO good and I bet could fool some people into thinking they're just eating chicken. The recipe as written on All Recipes would definitely not have worked as well (I noticed most of the reviewers did not follow the directions either) so I'm glad I changed it up.
I served it with whole grain bread and salad. I made a garlic butter with Brummel & Brown mixed with a bunch of goodies like fresh garlic, garlic powder, Italian seasonings, and salt. I felt so Italian with this meal :P
And yes, I would go so far as to say this is the best tofu dish I have ever made. It was really easy to make, too!
***
The other day, it was just me and my mom for dinner so I suggested to her that we try out one of the Annie's Mac and Cheese boxes that I bought at Sprouts a while ago. I was intrigued by a boxed mac and cheese (that used to be a childhood staple) that had a great ingredient list, used whole wheat pasta, and was white cheddar instead of orange!
Even though I should have just made the box as directed so I could see how the actual product tasted, I wanted to spice it up a bit. Especially since my mom isn't a fan of mac and cheese so I wanted to give it a bunch of flavor. I doctored it up by added hot sauce, creole seasoning, cayenne pepper, pepper, red chili flake, and salsa. Yes, we like things spicy over here in Texas :D
Also, to bulk it up so it's not just pasta, I added two "Jumbo" sized veggie dogs from Light Life. I just cut them into bite sized pieces and sauteed them with a little olive oil so they could brown up a bit before being added to the pasta.
 The verdict? This pasta is yummy! I tried a bite before I went all spice crazy and it tasted great. The veggie dogs worked out really well in this, too. The only thing I could find wrong with it is that it needed a lot more milk then the box said to use; the pasta wasn't very saucy. After I added more milk it was perfect. I probably wouldn't buy this again solely because I would probably never use it..I like creating meals so I always have ideas of what to eat. But for someone who is stuck in a rut or needs something to feed their kids, this is definitely a great choice.
And to keep the pasta trend going I have one more dish I would like to share...
Whole wheat orzo salad!
 I used this recipe from How Sweet It Is that is a whole wheat orzo salad with grilled chicken and sweet and tender roasted vegetables. Jessica's recipe is super simple but creates such complex flavors. I will be making this again and again!
Whole Wheat Orzo with Grilled Chicken and Roasted Veggies
2 cups whole wheat orzo (uncooked)
3 grilled chicken breasts, chopped into pieces. (I used two large ones)
1 tomato (I used two plum tomatoes)
1 green pepper
1 red pepper (I also added some more bell pepper)
1 vidalia onion
2 cloves garlic
1 tablespoon olive oil
2 tablespoons balsamic vinegar
1/4 cup parmesan cheese
salt and pepper to taste
Preheat oven to 425.
Chop veggies and garlic into slices and place on a baking sheet. Sprinkle with olive oil, balsamic vinegar, salt and pepper. Roast for about 25 minutes, tossing vegetables occasionally.
Cook orzo according to directions. Drain, and place in a casserole dish. Add chopped grilled chicken on top. Add veggies. Mix pasta until everything is combined.
Sprinkle Parmesan on top. Toss a few times to incorporate. Serve hot.
---
I was a little heavy handed on the vegetables; who wants to miss out on all that caramelized goodness? I served the pasta salad on top of spinach because I thought the spinach would go really well with it.
 Goodness gracious I loved this pasta dish. The tomatoes took on an almost sun-dried tomato flavor from the roasting and the balsamic vinegar glazed each and every vegetable with sweet goodness. I ended up having some leftovers with a couple cups of fresh spinach wilted down and mixed into the pasta and it was such a great addition! So next time, I will probably wilt a pound of spinach and mix it right into the pasta with all the rest of the veggies. Thanks so much for this amazing recipe, Jessica!
First up- how to transform leftovers.
On Valentines day, my mom cooked up steak that we got at Costco. Obviously, the Costco packages are huge so we had more than enough to go around. On the side we had a warm spinach and green bean salad with feta made by me plus a simple baked potato.

We had two and a half huge steaks leftover so I made Philly cheese steak sandwiches. For five sandwiches I used a quarter of a huge onion, one red bell pepper, a bunch of mushrooms, one slice of provolone cheese for each sandwich, and 1 1/2 (huge) steaks.
I sauteed the sliced veggies in olive oil with a dash of oregano and salt/pepper and then added thinly sliced steak at the end to brown just a bit. I broiled wheat hoagie rolls in the oven to give them a quick toast, put all the toppings on, placed a slice of cheese on top, and broiled again until all the cheese had melted.
Topped with a couple dabs of ketchup!

The last huge steak was utilized in yet another veggie stir fry.
We got three great, completely different meals out of one package of beef! I love utilizing leftovers :D
***
Speaking of leftovers, remember when I bought that huge package of fresh mozzarella at Costco for my tomato and mozzarella bruschetta? Well I've been utilizing that too!
First, I got the bright idea to make a margherita style pizza for lunch using a whole wheat pita as the base.


Cut into four for maximum eatability-


The second way I utilized the fresh mozzarella was in Tofu Parmesan!!
My mom and I were in a rut as to what to eat for dinner when I remembered that we had a block of tofu in the fridge. Since she was averse to eating it just by itself (like baked tofu, or something) I went to the internet for tofu ideas. This recipe was number one on All Recipe's top tofu recipes so I knew it had to be good!
I used the recipe as a guide, but didn't really follow its directions.
Here's my adaption:
Ingredients-
1/2 cup whole wheat Italian bread crumbs
5 tablespoons Parmesan cheese, divided
2 teaspoons dried oregano, divided
salt and pepper to taste
1 egg, well beaten
1 (14 ounce) block firm tofu
1 cup tomato sauce
1/2 teaspoon dried basil
1 clove garlic
4 ounces shredded mozzarella cheese (or fresh, if you got it!)
Directions-
In a small bowl, combine bread crumbs, 2 tablespoons Parmesan cheese, 1 teaspoon oregano, salt, and black pepper.
Press tofu for 15 minutes or more to get some of the water out. Slice (knife parallel to shorter end) into 16 slices that will be around 1/4 inch thick.
Dip tofu slices into egg mixture, and then into bread crumb mixture and place on a well greased cookie sheet. Spray the slices with additional cooking spray.
Bake at 375 for 20 minutes or until golden and crisped, flipping half way through.
Combine tomato sauce, basil, garlic, and remaining oregano. Place a thin layer of sauce in an 8 inch square baking pan. Arrange 8 tofu slices in one layer in the pan. Spoon half of remaining sauce over tofu, top with remaining 8 slices of tofu (this time rotate the slices so they are perpendicular to the first layer's slices).
Top with the rest of the sauce, mozzarella, and remaining 3 tablespoons Parmesan.
Bake at 400 for 20 minutes.

I served it with whole grain bread and salad. I made a garlic butter with Brummel & Brown mixed with a bunch of goodies like fresh garlic, garlic powder, Italian seasonings, and salt. I felt so Italian with this meal :P
And yes, I would go so far as to say this is the best tofu dish I have ever made. It was really easy to make, too!
***
The other day, it was just me and my mom for dinner so I suggested to her that we try out one of the Annie's Mac and Cheese boxes that I bought at Sprouts a while ago. I was intrigued by a boxed mac and cheese (that used to be a childhood staple) that had a great ingredient list, used whole wheat pasta, and was white cheddar instead of orange!
Even though I should have just made the box as directed so I could see how the actual product tasted, I wanted to spice it up a bit. Especially since my mom isn't a fan of mac and cheese so I wanted to give it a bunch of flavor. I doctored it up by added hot sauce, creole seasoning, cayenne pepper, pepper, red chili flake, and salsa. Yes, we like things spicy over here in Texas :D
Also, to bulk it up so it's not just pasta, I added two "Jumbo" sized veggie dogs from Light Life. I just cut them into bite sized pieces and sauteed them with a little olive oil so they could brown up a bit before being added to the pasta.

And to keep the pasta trend going I have one more dish I would like to share...
Whole wheat orzo salad!

Whole Wheat Orzo with Grilled Chicken and Roasted Veggies
2 cups whole wheat orzo (uncooked)
3 grilled chicken breasts, chopped into pieces. (I used two large ones)
1 tomato (I used two plum tomatoes)
1 green pepper
1 red pepper (I also added some more bell pepper)
1 vidalia onion
2 cloves garlic
1 tablespoon olive oil
2 tablespoons balsamic vinegar
1/4 cup parmesan cheese
salt and pepper to taste
Preheat oven to 425.
Chop veggies and garlic into slices and place on a baking sheet. Sprinkle with olive oil, balsamic vinegar, salt and pepper. Roast for about 25 minutes, tossing vegetables occasionally.
Cook orzo according to directions. Drain, and place in a casserole dish. Add chopped grilled chicken on top. Add veggies. Mix pasta until everything is combined.
Sprinkle Parmesan on top. Toss a few times to incorporate. Serve hot.
---
I was a little heavy handed on the vegetables; who wants to miss out on all that caramelized goodness? I served the pasta salad on top of spinach because I thought the spinach would go really well with it.

Goodnight!
<3
Subscribe to:
Posts (Atom)