As a child, I LOVED making monkey bread with my siblings and my dad. He would make a homemade biscuit dough and cut it up into little pieces. We found it so fun to roll those pieces into balls and place them in cinnamon sugar; but what we loved even more was eating the finished masterpiece. The smell that emits from a kitchen that has just produced monkey bread is a very distinct smell. If you've ever smelled it, you know how amazing it is.
I was missing that smell; and (as always) was trying to figure out how I could make a healthier version of my childhood favorite. I knew that monkey bread can be made with both biscuit dough or yeasted dough, so it had me thinking. What if I subbed in one of my favorite whole wheat bread doughs for the classic brioche-style dough that is typically used?
I knew that using a simple bread dough instead of an enriched dough might mess with the texture; so I wasn't sure which dough base I wanted to go with.
And then it hit me. Why not use my favorite whole wheat cinnamon roll dough? Since it is an enriched dough, it will impart the same texture and on the plus side it has very little fat and over 2/3rds of the total flour is whole wheat flour.
This dough manages to stay light and airy besides the lack of butter and the use of dense flour. The secret is 3/4 cup of pumpkin puree! Besides its amazing health benefits, the pumpkin does wonders to this dough.
I got the recipe from Good Life Eats but will copy the ingredients for the dough from her post (with a couple slight adjustments)-
1/4 cup warm water
2 1/4 teaspoons active dry yeast
1/3 cup warm milk
1 large egg, beaten
3/4 cup pumpkin puree
1 tablespoon melted butter
2 1/4 cups whole wheat flour (not pastry)
1 cup white bread flour or all-purpose
1/2 cup brown sugar
1 teaspoon salt
3/4 teaspoon cinnamon
1/4 teaspoon ground ginger
1/4 teaspoon ground cardamom
I just put all the ingredients in my bread machine, hit the dough cycle button, and walked away for about an hour. Well actually, I usually put everything in except the 1 cup of bread flour and will add it gradually as it is mixing to see if I need it all. This time I think I may have needed even more flour! The dough was a little "wet".
Once it was done, I rolled the dough out and cut it into small pieces. It doesn't really matter the size; but the smaller they are, the larger sugar coating per amount of dough ratio. Does that make sense?
Roll em into balls if you want; they're all going to get misshapen in the end though, so don't get too finicky.
Now to assemble the rest of the ingredients.
You will need:
1 cup dark brown sugar
1 cup white sugar
1 tablespoon cinnamon
Mix all of those ingredients together in a bowl.
In another bowl, melt 1/2 cup of, get this...Brummel & Brown butter! That's right, instead of a whole stick of real butter, I substituted Brummel & Brown just to see how it would go.
You'll also want to grease a bundt pan with a little non-stick cooking spray.
And you're all ready to assemble!
First, place a dough ball (only a few at a time) into the "butter"-
Make sure it's coated and then roll it around in the sugar/cinnamon mixture-
Place the finished dough balls into the bundt pan.
Once you've finished with all the dough balls, drizzle the whole thing with the extra "butter" and any extra sugar you might have left (I didn't have any sugar mixture left).
YUM! I'm so glad I substituted the Brummel & Brown for butter in this thing, because it uses a lot of butter! With over half the amount of fat and calories, it makes a bit difference nutritionally in the final product. Also, it worked great as a coating for the dough balls and creating a sugary syrup once it was all baked.
Now, you can either let it rise for about an hour and bake it up OR you can cover it with plastic wrap and let it rise slowly in the refrigerator overnight. Since I wanted fresh out-of-the-oven monkey bread in the morning, I went with the latter approach.
The dough will rise a little in the refrigerator but will still need to warm up and rise a little in the morning. I decided to go with the technique that Alton Brown used in his overnight monkey bread recipe.
First, fill a shallow pan 2/3rds full with boiling water. Place the pan onto the bottom rack of an oven that is turned off. Take the monkey bread out of the fridge and place it on a rack above the boiling water and close the oven door. Let it rise for 30 minutes, or until it looks puffy.
Then, remove the pan of water and the monkey bread and turn on the oven to 350. Once the oven is to temperature, place the monkey bread on the center rack and bake until golden which will be around 20-30 minutes.
My dad helped me with the baking portion because he gets up early in the morning. He tested for doneness with a thermometer to see if the bread had gotten to an internal temperature of 190 degrees, and took it out at around 22 minutes.
All done!
Usually, one would flip the bundt pan over and remove the monkey bread, but I guess my dad got a little too excited and just dug right in straight from the pan. Oh well!
It wouldn't be a bad idea, either, to drizzle the finished product with a little cream cheese glaze...mmmm.
My plate-
This monkey bread was super flavorful with the addition of cinnamon, ginger, and cardamom in the dough itself. You can faintly taste the pumpkin, but it's really just there to help with the rise and contribute an amazing color.
The Brummel & Brown coated the dough beautifully in a sugary glaze. A dollop of tart greek yogurt was the perfect accompaniment to the super sweet bread.
My only complaint is that it was too sweet. And even though that's not surprise to hear me say that (since I can't handle things being too sweet, especially in the morning) even my sweet loving brother thought it seemed more "like a dessert". Of course, the too-sweet factor didn't stop the monkey bread from being devoured in one day :D
Next time, I think I'll cut the amount of sugar in the dough in half. I could probably decrease the sugar to 1 1/2 cups total for the coating, but too little sugar and there won't be enough to coat the balls! Another way to make it less sweet would be to make the dough balls bigger. The bigger they are, the less sugar is used per amount of dough.
Either way I decide to do it, there will be a next time!
Monkey bread or pull-apart bread...which way do you call it?
Ever since I can remember, it's always been monkey bread!
Sunday, April 17, 2011
Tuesday, April 12, 2011
An Italian Creme Cake for a Not So Italian Birthday Feast
Two weekends ago, my brother, Justin, came down from Fort Worth to spend some time with his family. Since he came down early afternoon on a Saturday (which happened to be the bake sale day) and left in the evening of the next day, we didn’t have a lot of time to do much of anything!
My dad, however, pulled out the big guns and worked up a brisket for dinner on Sunday night which we named the night we were going to celebrate his birthday since his birthday was only a couple of days later.
This brisket was cooked low and slow (is there any other way of cooking it?) and was actually nice and lean!
Also, the Stubbs sauce is a must. We have a couple other bottles of BBQ sauce in the fridge that just do NOT compare. Plus, they’re just so sweet you can barely taste anything else. Who needs 12 grams of sugar in a 2 tablespoon serving (*cough*Bulls-Eye BBQ sauce *cough*)? FYI, that’s one whole tablespoon of sugar in just one TWO tablespoon serving. Stubbs, on the other hand, has 3 grams of sugar and has a perfectly balanced flavor that enhances anything you put it on.
Note: pictured is the spicy version; we usually get the original version and I think the consensus was that the original tastes better because this one was a little too spicy (unless you like your BBQ sauces that way).
The first couple of slices were a little chubby (the normal brisket chub) but after those couple slices the rest was very lean yet succulent and tender...way to go dad! (and thank you, cow, for being lean) :D
| The chubbier slices. |
On the side, we had steamed green beans (love!) and a potato salad made by yours truly.
And messed up by yours truly as well! I was multitasking (making the birthday cake!) when I was boiling the potatoes, so they ended up a tad bit more cooked than I would have liked, but they held up their shape enough to be passable.
It was actually super simple to make, all I did was add a couple huge glugs of light italian dressing (Newman's Own, to be exact) and some freshly ground pepper and it was perfect! The Italian dressing added all the flavors it needed and the moisture to keep it from going dry. Chilling the potato salad for a couple hours would be best, but I was pressed for time (read: dinner in 30 minutes) so I threw it in the freezer. A little luke-warm in spots, but still very very good!
Deeeeelish dinner, and it didn't stop there!
Every birthday dinner has to end with a cake, and this one was no different.
Since I always do chocolate cake or chocolate frosting, I decided to mix it up and do something a little different. I went with this lightened up Italian Creme Cake recipe I found that I have been wanting to make for months!
Since we had so many bake sale goodies laying around, I decided to make only half of a cake. Besides halving all the ingredients, I also added 1/4 teaspoon of salt and omitted the butter extract since I didn't have any. As for the "light butter" ingredient, I went with Brummel & Brown (of course).
I frosted the cake with softened low fat cream cheese (maybe 5 ounces?) that I beat with some powdered sugar, vanilla, and about 1/3 cup of some leftover frosting from the bake sale cupcakes. Since the leftover frosting was pretty light and fluffy in texture, it allowed the cream cheese frosting to not end up as dense.
My brother was pretty excited..
He turned 26! What an oldie...
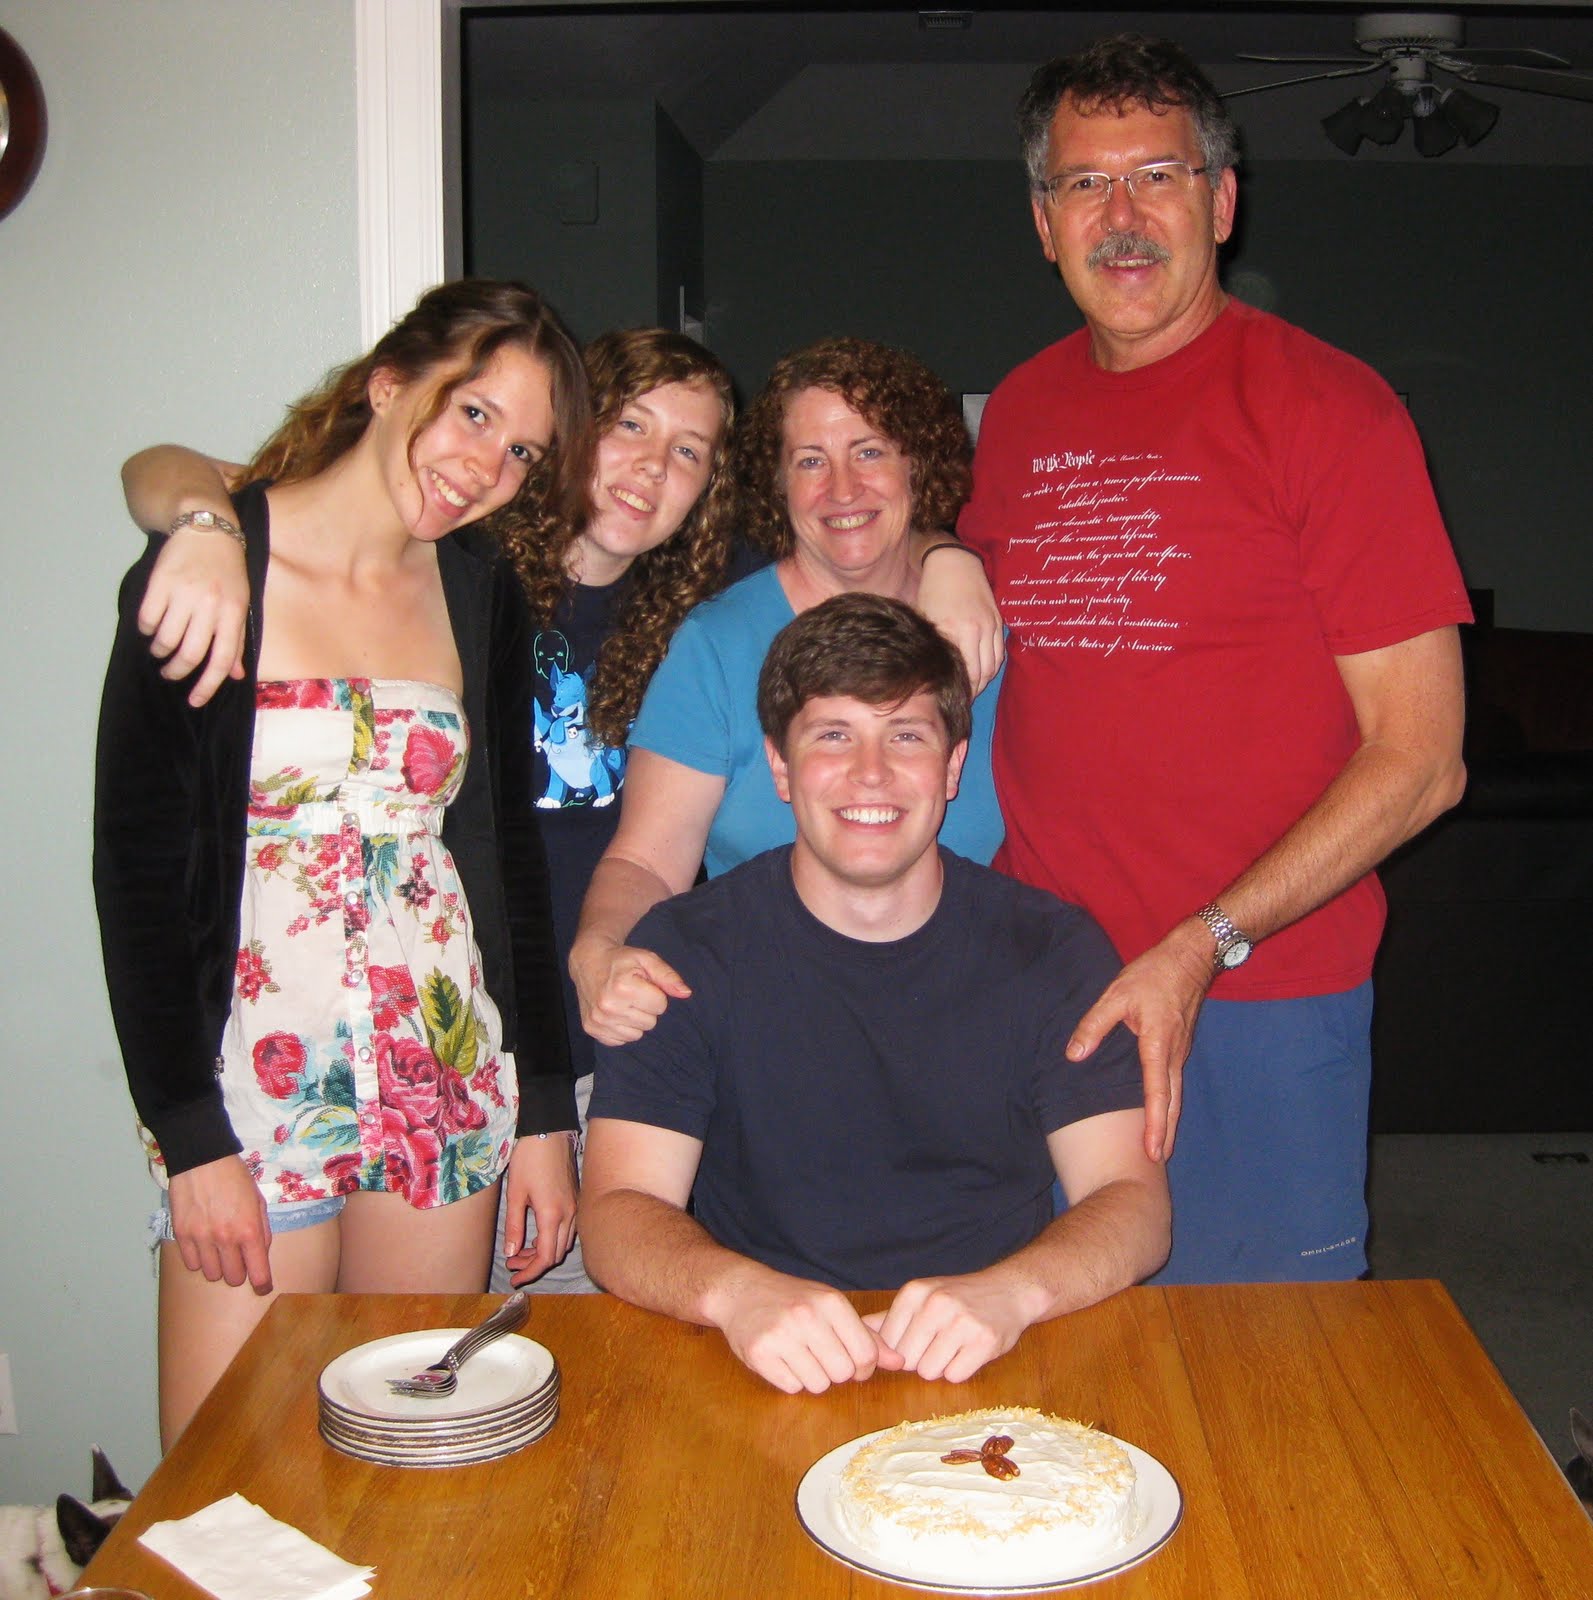
Here's the fam (minus brother #2 who had prior obligations) posing with the mini cake.
Me, Devon, my mom, Justin, and my dad. Awh. So cute...
The whole process of the cake was a little more time consuming than some other cake recipes because it required you to whip the egg whites up separately and then fold them into the finished batter. Though a bit tedious, it really adds to the final product and worth the effort!
I wasn't sure how this was going to turn out, but it was a HIT! Even though it's lacking real coconut in the batter (part of "lightening up" the recipe) I did not miss it one bit! This had a crazy amount of flavor and everyone could not stop "mmm"ing. The frosting complimented the cake perfectly and I was repeatedly told how good this cake was even days after.
I've made quite a few cakes in my day (okay, so not that many compared to a lot of other people..) and I could tell that this one was definitely a winner with the family (and me!)
Really, you need to try this recipe. Really.
It tastes in no way like a "healthier" or "lighter" cake. This is no white cake with a couple pecans mixed in...this cakes got FLAVOR! I did think it was weird that the recipe called for no salt, so I did add 1/4 teaspoon (1/2 teaspoon for the whole recipe) and I would definitely recommend doing this. Do not overestimate the power of salt, people!
Anyway, the meal was great, and my brother is now rolling in the 2-6's! Happy belated birthday, Bieber. (:
Tuesday, April 5, 2011
Baked Goods Galore
Let me just begin by saying that the bake sale was a smashing success! Just Austin alone raised over 11 thousand dollars :D
For my contribution, I decided to go with cookie dough stuffed chocolate cupcakes and the classic magic bar with a little twist. For the cupcakes, I used my favorite cookie dough ball recipe, combined it with my favorite chocolate cake recipe and experimented with a NEW vanilla frosting to top it all off.
I simply froze tablespoon sized cookie dough balls overnight and then added one to each cupcake before baking. The idea is that the frozen cookie dough ball shouldn't bake a whole lot because it is so cold and that the cupcake batter will bake up over the dough ball. The end product is a cupcake with a unforeseen surprise inside that is almost raw cookie dough (is bakes a little but not enough to be cookie-like yet).
The biggest problem you can run into? Not freezing your dough balls long enough so that they are rock hard. I froze mine overnight but that wasn't long enough. Since this was the day before the bake sale I had no choice but to go ahead and proceed despite their softness.
Instead of sinking to the bottom and being enclosed with cupcake batter as they should have, the dough balls stayed at the top and since they were not rock hard frozen they baked quite a bit. Definitely not what I wanted!
At this point I was pretty mad because I thought that my huge batch of cupcakes for the bake sale was ruined but I just continued on, hoping for the best.
For the frosting, I used a frosting recipe that I have been eying for quite some time. Its a not-so-sweet icing that is very light and sets up well. The interesting part about it is that it uses a flour and milk mixture that is heated on the stove top until very thick and then added to the other ingredients.
I used this recipe, which has the aforementioned flour and milk mixture, 1 cup of both butter and powdered sugar, and vanilla.
However, the directions were unclear (I didn't know the flour/milk mixture had to be cooled completely) so my frosting turned into a soupy mess.
I attempted to resurrect the frosting by cooling it in the fridge and whipping it again, but then it just turned into a separated soupy mess.
Tasted good...looked disgusting. And in no way functional as a frosting. I hate wasting ingredients but this whole thing had to go straight into the trash! Such a bummer.
Okay so picture this. Its 9 o' clock at night and the bake sale is the next morning, you only have two more sticks of butter and the cupcakes have to be frosted tonight. You had your sights set on making a highly acclaimed frosting and you could make it again, but there's the chance the frosting could turn out the exact same way and you would be left with no frosting, no butter, and no open grocery store. What do you do?
Well, I decided to use a slightly different flour frosting recipe that ups the proportion of flour by a couple tablespoons, uses granulated sugar, and tells you to cool the milk/flour mixture completely before proceeding. It was risky, but to me it was worth the risk!
I used this recipe, and made sure to do everything perfectly.
Success!
Now that's frosting! Light and fluffy, almost like whipped cream, but sets up just like any other sugar filled frosting yet it is only lightly sweet. Perfect!
Good frosting v. bad frosting:
Combine the frosting fiasco with the fact that my cupcakes didn't turn out as planned AND that it was getting late, it would be to suffice to say that I was pretty burned out. And then to make it all even worse, my piping bag sprung a leak and in the process of transferring the frosting to another bag a good half cup found its way onto objects that were not the bag I wanted to transfer it to. Think frosting all over the cabinets and all over me and you get the picture.
Despite the setbacks I made some pretty cute cupcakes!
I topped each one with a couple mini chocolate chips.
The frosting starts out really soft but set up nicely after an hour or so.
Since I've never made these before, I had to do a taste test before I distributed them out to the masses.
Even though the cookie dough was a little too "cooked" for my liking, these turned out really great! I honestly can't remember much about their taste because I only had half of a cupcake and I was pretty burned out at that point (and had way too much sugar that day) but I do remember them being very good and the few leftover from the bake sale were eaten by my family and I know they loved them. I need to make these again (the right way!) so I can get a good taste of them! I do know, however, that this frosting recipe is a keeper. Especially since I don't like way sweet frostings, this one is perfect.
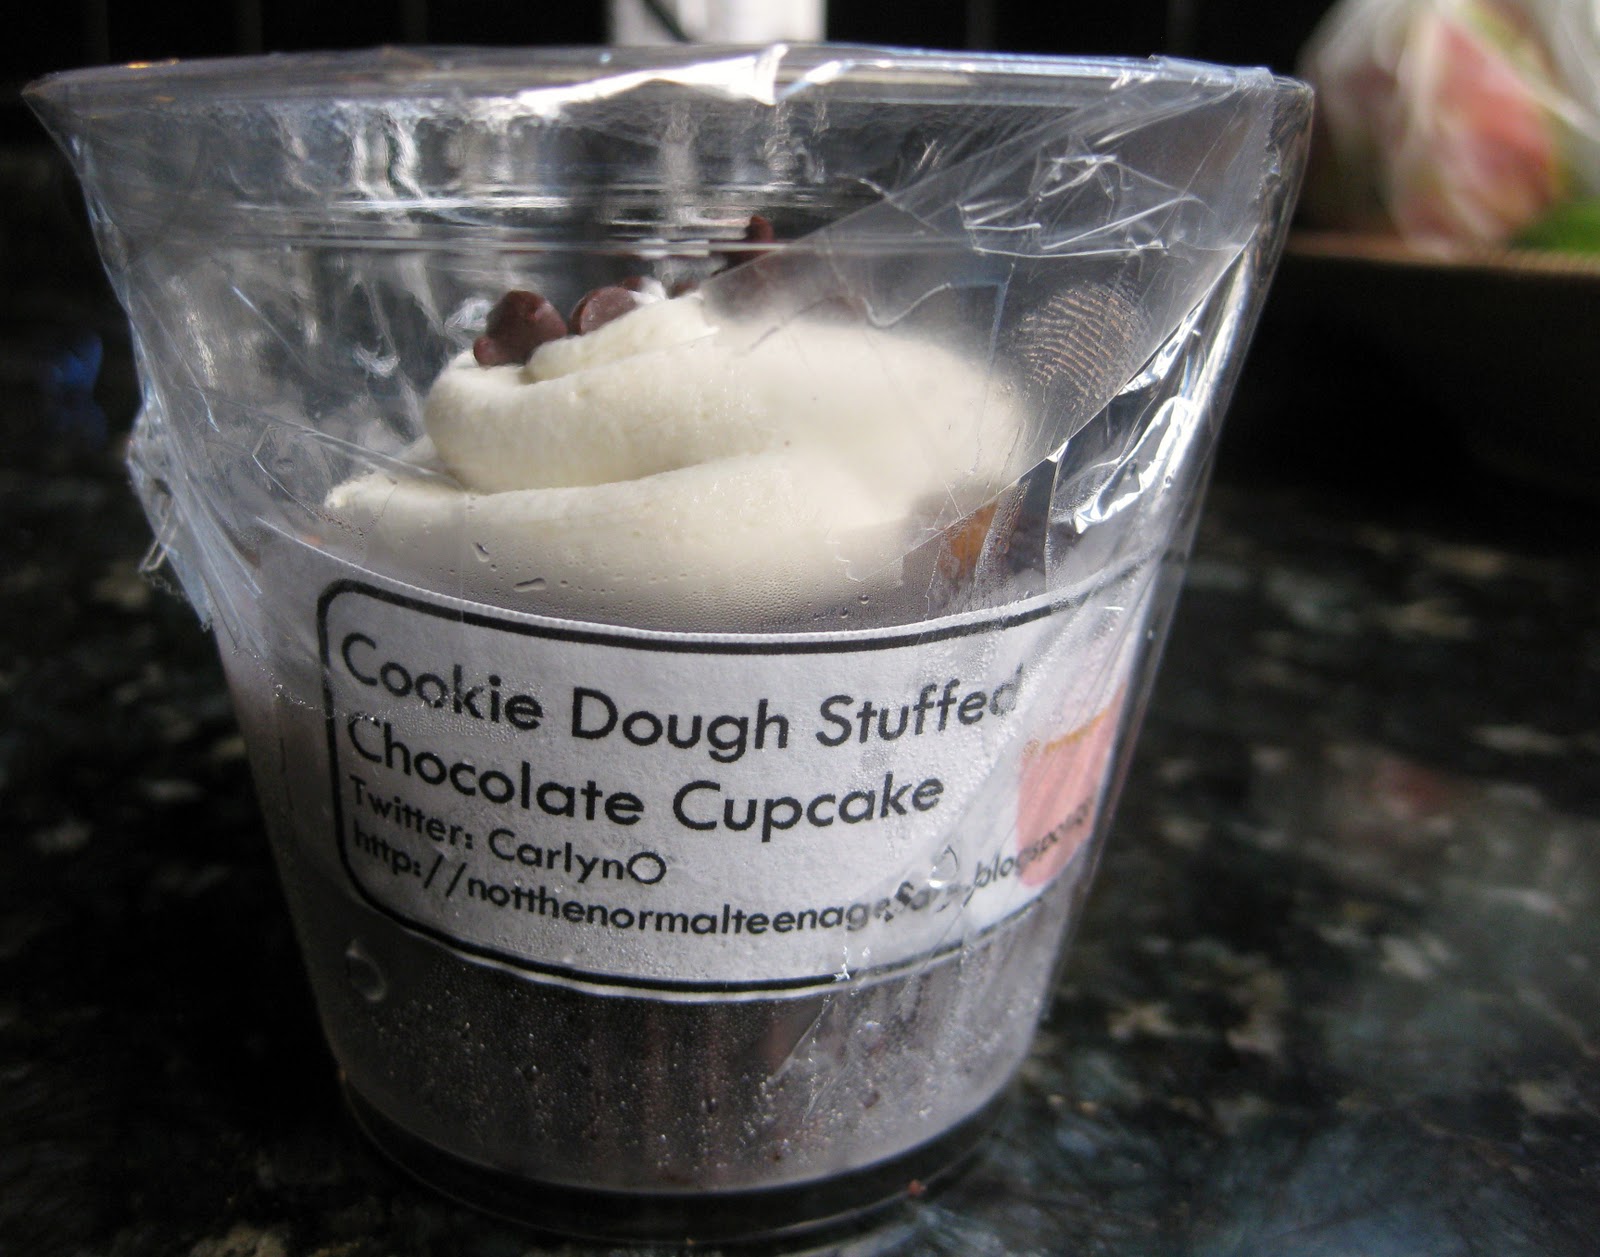
I packaged them individually in little punch cups that I topped with plastic wrap.
I could have made it look prettier with some cellophane bunched up at the top with a bow tied around it but then buyers wouldn't be able to see the product!
Besides making cupcakes, I made magic bars which is a bar that usually contains some combination of "chips" (chocolate, peanut butter, butterscotch, etc) coconut, a type of nut, a graham cracker crust, and a can of sweetened condensed milk that holds it all together.
Since I knew these have a tendency of being a little on the sweet side, I used unsweetened coconut. For the chips I used half bittersweet and half milk, and for the nuts I used toasted pecans. I also used non fat evaporated milk and no one was the wiser (:
Instead of using some generic store bought graham crackers, I decided to go all out and make my own!
I've made graham crackers before, and they tasted very good but were definitely missing something. But these ones, these ones were amazing! I used an Alton Brown recipe that I knew would yield great results. I loved that the recipe was in all weight measurements; its so much harder to mess up that way! The only thing I did differently was used half honey and half molasses instead of all molasses (I definitely recommend this). I think what really made these was that little pop of kosher salt!
THIS is the recipe to use if you want out of this world graham crackers. Don't even attempt any others. They won't be any where close to as fantastic as these guys!
Anyway, the magic bar recipe is pretty generic, you can find it anywhere, but it basically goes like this:
1 1/2 cup graham cracker crumbs
1 stick (1/2 cup) melted butter
1 1/3 cup shredded unsweetened coconut
2 cups chips (peanut butter, white, dark, milk, butterscotch, etc)
1 cup toasted nut of choice
1 (14 ounce) can sweetened condensed milk (can use non fat)
Mix together the crumbs and the butter, press down into a 9x13 pan, top with rest of the ingredients, pour the milk evenly on top. Into the oven at 350 for about 25 minutes or until golden brown.
Oh, and make sure you cool completely before cutting; it really helps.
The whole sweetened condensed milk thing may sound weird at first, but it caramelizes in the oven and turns into a caramel that sticks everything together. SO GOOD.
I packaged these by just wrapping them in plastic wrap and putting the label on the back so people could see what they were looking at.
It was my first time making these as well, so I'm glad they turned out pretty much amazing.
Everyone brought so many amazing things! There were mini pies on a stick, muffins,cake pops, cupcakes, cookies, macarons, sweet breads, pies, donuts, brownies, and bars galore.
Here's some of my bars and cupcakes out for display. A lot of companies donated baked goods, too.
And of course, we even had a dedicated section for vegan and gluten free items (:
We had a never ending supply so that whenever there was a free space on the table, another treat was put out.
There's a sign I made...and my attempt at drawing a cupcake that actually looks more like a piece of turd :/
And here's me posing with my treats!
Not only did they have treats for humans, but they also had a couple treats for dogs too!
I thought these were real cute-
Little bite-sized pizzas. The ingredient list was something like flour, Parmesan cheese, olive oil, oregano, tomato sauce, and baking soda. So simple; I love it!
And you can bet my dogs loved them too-
The dogs had a blast and so did my sister, Devon. She came by with the dogs and my dad to get some treats.
She's really into Japanese culture, so she loved all the Japanese inspired treats and the origamis.
Am I a bad sister for putting this up? (:
Not only did I like doing something that will help the people in Japan, but I also got to bake up a lot of goodies and meet a bunch of local bloggers!
So... when's the next bake sale? :P
![]() |
| Some of the volunteers |
I simply froze tablespoon sized cookie dough balls overnight and then added one to each cupcake before baking. The idea is that the frozen cookie dough ball shouldn't bake a whole lot because it is so cold and that the cupcake batter will bake up over the dough ball. The end product is a cupcake with a unforeseen surprise inside that is almost raw cookie dough (is bakes a little but not enough to be cookie-like yet).
The biggest problem you can run into? Not freezing your dough balls long enough so that they are rock hard. I froze mine overnight but that wasn't long enough. Since this was the day before the bake sale I had no choice but to go ahead and proceed despite their softness.
Instead of sinking to the bottom and being enclosed with cupcake batter as they should have, the dough balls stayed at the top and since they were not rock hard frozen they baked quite a bit. Definitely not what I wanted!
At this point I was pretty mad because I thought that my huge batch of cupcakes for the bake sale was ruined but I just continued on, hoping for the best.
For the frosting, I used a frosting recipe that I have been eying for quite some time. Its a not-so-sweet icing that is very light and sets up well. The interesting part about it is that it uses a flour and milk mixture that is heated on the stove top until very thick and then added to the other ingredients.
I used this recipe, which has the aforementioned flour and milk mixture, 1 cup of both butter and powdered sugar, and vanilla.
However, the directions were unclear (I didn't know the flour/milk mixture had to be cooled completely) so my frosting turned into a soupy mess.
I attempted to resurrect the frosting by cooling it in the fridge and whipping it again, but then it just turned into a separated soupy mess.
Tasted good...looked disgusting. And in no way functional as a frosting. I hate wasting ingredients but this whole thing had to go straight into the trash! Such a bummer.
Okay so picture this. Its 9 o' clock at night and the bake sale is the next morning, you only have two more sticks of butter and the cupcakes have to be frosted tonight. You had your sights set on making a highly acclaimed frosting and you could make it again, but there's the chance the frosting could turn out the exact same way and you would be left with no frosting, no butter, and no open grocery store. What do you do?
Well, I decided to use a slightly different flour frosting recipe that ups the proportion of flour by a couple tablespoons, uses granulated sugar, and tells you to cool the milk/flour mixture completely before proceeding. It was risky, but to me it was worth the risk!
I used this recipe, and made sure to do everything perfectly.
Success!
Now that's frosting! Light and fluffy, almost like whipped cream, but sets up just like any other sugar filled frosting yet it is only lightly sweet. Perfect!
Good frosting v. bad frosting:
Combine the frosting fiasco with the fact that my cupcakes didn't turn out as planned AND that it was getting late, it would be to suffice to say that I was pretty burned out. And then to make it all even worse, my piping bag sprung a leak and in the process of transferring the frosting to another bag a good half cup found its way onto objects that were not the bag I wanted to transfer it to. Think frosting all over the cabinets and all over me and you get the picture.
Despite the setbacks I made some pretty cute cupcakes!
I topped each one with a couple mini chocolate chips.
The frosting starts out really soft but set up nicely after an hour or so.
Since I've never made these before, I had to do a taste test before I distributed them out to the masses.
Even though the cookie dough was a little too "cooked" for my liking, these turned out really great! I honestly can't remember much about their taste because I only had half of a cupcake and I was pretty burned out at that point (and had way too much sugar that day) but I do remember them being very good and the few leftover from the bake sale were eaten by my family and I know they loved them. I need to make these again (the right way!) so I can get a good taste of them! I do know, however, that this frosting recipe is a keeper. Especially since I don't like way sweet frostings, this one is perfect.
I packaged them individually in little punch cups that I topped with plastic wrap.
| Oops..looks like I left a finger print! |
| Clear as day. |
Since I knew these have a tendency of being a little on the sweet side, I used unsweetened coconut. For the chips I used half bittersweet and half milk, and for the nuts I used toasted pecans. I also used non fat evaporated milk and no one was the wiser (:
Instead of using some generic store bought graham crackers, I decided to go all out and make my own!
I've made graham crackers before, and they tasted very good but were definitely missing something. But these ones, these ones were amazing! I used an Alton Brown recipe that I knew would yield great results. I loved that the recipe was in all weight measurements; its so much harder to mess up that way! The only thing I did differently was used half honey and half molasses instead of all molasses (I definitely recommend this). I think what really made these was that little pop of kosher salt!
THIS is the recipe to use if you want out of this world graham crackers. Don't even attempt any others. They won't be any where close to as fantastic as these guys!
Anyway, the magic bar recipe is pretty generic, you can find it anywhere, but it basically goes like this:
1 1/2 cup graham cracker crumbs
1 stick (1/2 cup) melted butter
1 1/3 cup shredded unsweetened coconut
2 cups chips (peanut butter, white, dark, milk, butterscotch, etc)
1 cup toasted nut of choice
1 (14 ounce) can sweetened condensed milk (can use non fat)
Mix together the crumbs and the butter, press down into a 9x13 pan, top with rest of the ingredients, pour the milk evenly on top. Into the oven at 350 for about 25 minutes or until golden brown.
Oh, and make sure you cool completely before cutting; it really helps.
The whole sweetened condensed milk thing may sound weird at first, but it caramelizes in the oven and turns into a caramel that sticks everything together. SO GOOD.
I packaged these by just wrapping them in plastic wrap and putting the label on the back so people could see what they were looking at.
It was my first time making these as well, so I'm glad they turned out pretty much amazing.
Everyone brought so many amazing things! There were mini pies on a stick, muffins,cake pops, cupcakes, cookies, macarons, sweet breads, pies, donuts, brownies, and bars galore.
Here's some of my bars and cupcakes out for display. A lot of companies donated baked goods, too.
And of course, we even had a dedicated section for vegan and gluten free items (:
We had a never ending supply so that whenever there was a free space on the table, another treat was put out.
There's a sign I made...and my attempt at drawing a cupcake that actually looks more like a piece of turd :/
And here's me posing with my treats!
![]() |
| Photo by Nathan Russel Photography |
I thought these were real cute-
Little bite-sized pizzas. The ingredient list was something like flour, Parmesan cheese, olive oil, oregano, tomato sauce, and baking soda. So simple; I love it!
And you can bet my dogs loved them too-
| Tyson and Missy |
| Felt like 90 degrees and she's wearing a scarf.. |
Am I a bad sister for putting this up? (:
Not only did I like doing something that will help the people in Japan, but I also got to bake up a lot of goodies and meet a bunch of local bloggers!
So... when's the next bake sale? :P
Friday, April 1, 2011
Austin Bakes for Japan
Hey y'all! I've been baking up a storm the past couple of days in preparation for the city wide and nation wide bake sale for Japan on Saturday. I believe 19 other cities besides Austin are participating and all proceeds go to AmeriCares for Japan. In just Austin alone there will be five separate bake sales across the city!
If you're in Austin, here's the locations list:
http://austinbakes.wordpress.com/2011/03/24/austin-bakes-for-japan-locations-announced/
Come out and buy some delicious treats tomorrow from 9am-2pm! I'll be volunteering at the Mira Vista location in Westlake where there will be a "block party" with all the surrounding shops in that shopping center.
And what will I be bringing?
Cookie dough stuffed chocolate cupcakes and magic bars with a homemade graham cracker crust!
Delicious baked treats for a great cause? There's no reason not to come!
For more information: http://austinbakes.wordpress.com/
If you're in Austin, here's the locations list:
http://austinbakes.wordpress.com/2011/03/24/austin-bakes-for-japan-locations-announced/
Come out and buy some delicious treats tomorrow from 9am-2pm! I'll be volunteering at the Mira Vista location in Westlake where there will be a "block party" with all the surrounding shops in that shopping center.
And what will I be bringing?
Cookie dough stuffed chocolate cupcakes and magic bars with a homemade graham cracker crust!
Delicious baked treats for a great cause? There's no reason not to come!
For more information: http://austinbakes.wordpress.com/
Subscribe to:
Posts (Atom)