Friday, February 18, 2011

The Savory

Yesterday, I was all about the sweets but today, it is all about savory meals.
First up- how to transform leftovers.
On Valentines day, my mom cooked up steak that we got at Costco. Obviously, the Costco packages are huge so we had more than enough to go around. On the side we had a warm spinach and green bean salad with feta made by me plus a simple baked potato.
I haven't had a plain ol' baked potato in so long! I topped it with Greek yogurt, seasonings, Brummel & brown butter, and green onion.

We had two and a half huge steaks leftover so I made Philly cheese steak sandwiches. For five sandwiches I used a quarter of a huge onion, one red bell pepper, a bunch of mushrooms, one slice of provolone cheese for each sandwich, and 1 1/2 (huge) steaks.
I sauteed the sliced veggies in olive oil with a dash of oregano and salt/pepper and then added thinly sliced steak at the end to brown just a bit. I broiled wheat hoagie rolls in the oven to give them a quick toast, put all the toppings on, placed a slice of cheese on top, and broiled again until all the cheese had melted.
Topped with a couple dabs of ketchup!
Yummy!! We really extended the amount of beef because I used a bunch of vegetables. The flavors are so simple but when combined they created magic! I could probably have this sub 5 days in a row and not get tired of it..and that's saying something.

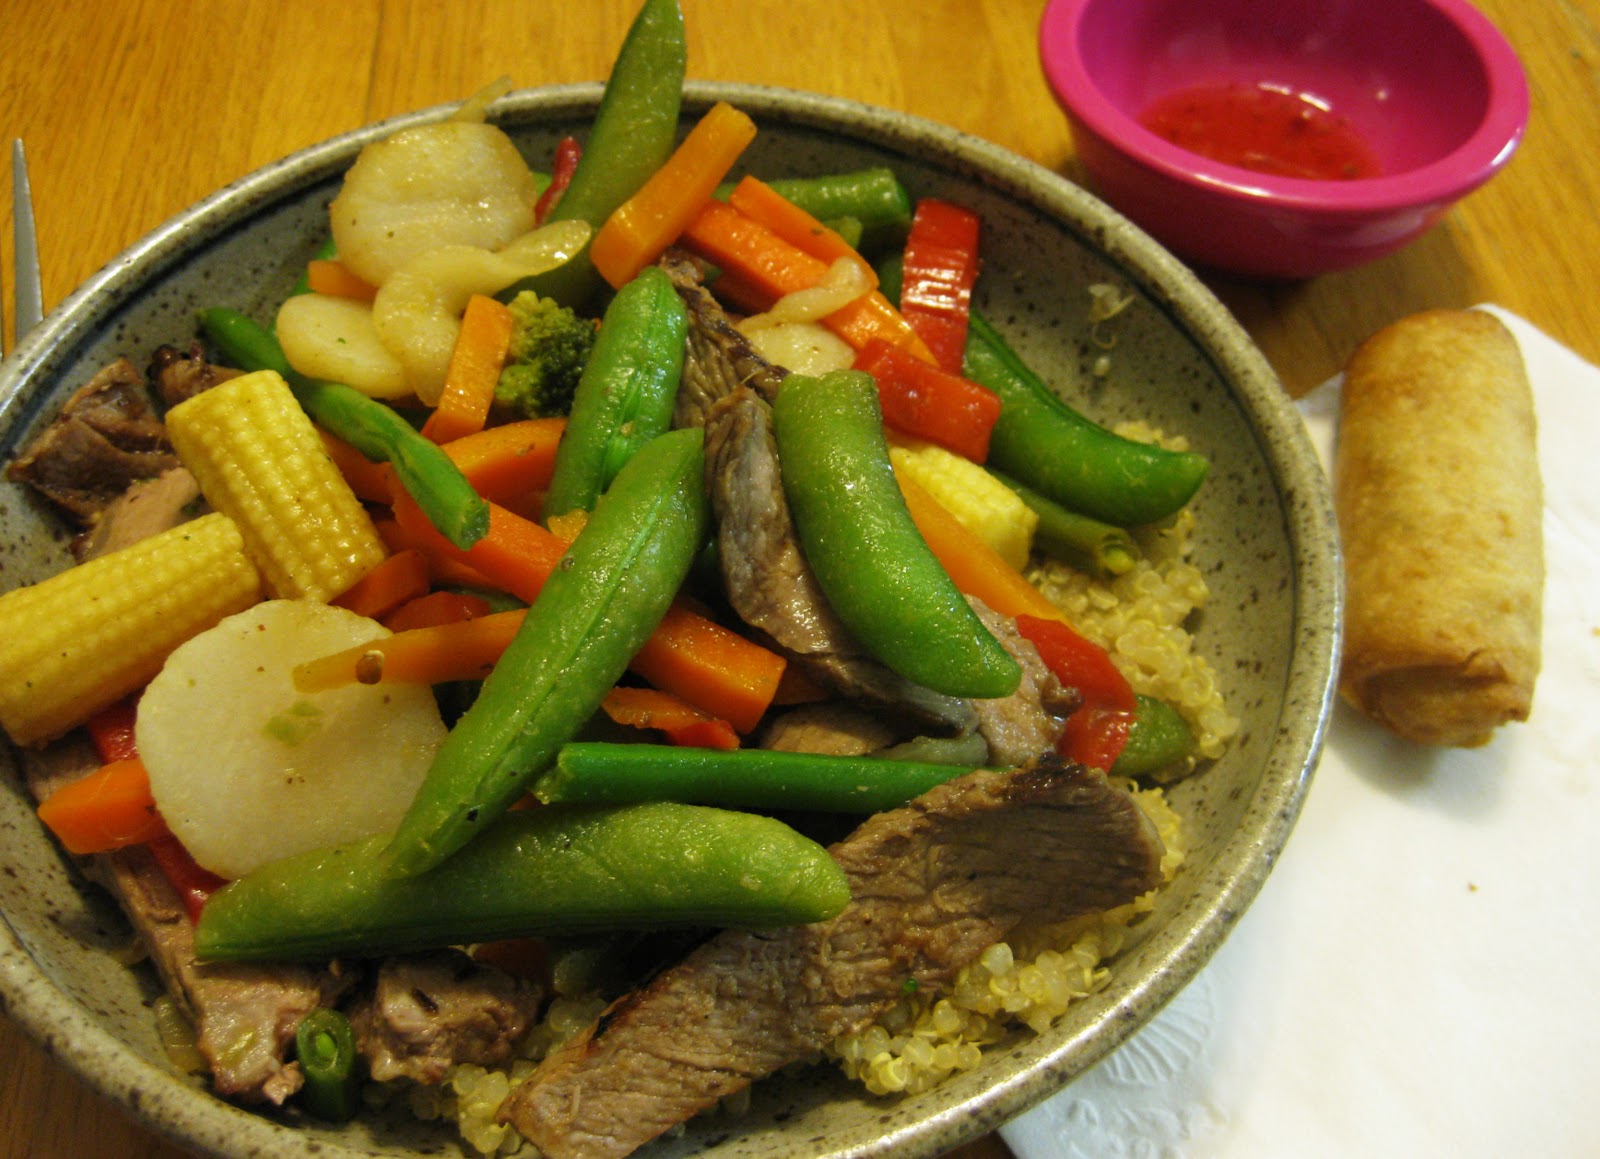
The last huge steak was utilized in yet another veggie stir fry.
Served on top of quinoa, with a couple vegetable egg rolls on the side (from Costco!) If you're wondering how to do an easy stir fry, this post might help.

We got three great, completely different meals out of one package of beef! I love utilizing leftovers :D
***
Speaking of leftovers, remember when I bought that huge package of fresh mozzarella at Costco for my tomato and mozzarella bruschetta? Well I've been utilizing that too!

First, I got the bright idea to make a margherita style pizza for lunch using a whole wheat pita as the base.
I put the pita in the oven as it was heating up (set to broil) while I prepared the rest of the ingredients. This way it would be crispy despite all of the moist ingredients. Topped with pesto as the base, a lot of fresh mozzarella (maybe too much?), tomato slices, salt, and pepper. I put it back in the oven for a couple minutes and BAM.
 In less than 10 minutes I had delicious, oozing goodness for lunch..on a school day!
Cut into four for maximum eatability-
Oh yes. Absolutely amazing.
I would pay big bucks for this at a restaurant :D

The second way I utilized the fresh mozzarella was in Tofu Parmesan!!
My mom and I were in a rut as to what to eat for dinner when I remembered that we had a block of tofu in the fridge. Since she was averse to eating it just by itself (like baked tofu, or something) I went to the internet for tofu ideas. This recipe was number one on All Recipe's top tofu recipes so I knew it had to be good!

I used the recipe as a guide, but didn't really follow its directions.
Here's my adaption:

Ingredients-
1/2 cup whole wheat Italian bread crumbs
5 tablespoons Parmesan cheese, divided
2 teaspoons dried oregano, divided
salt and pepper to taste
1 egg, well beaten
1 (14 ounce) block firm tofu
1 cup tomato sauce
1/2 teaspoon dried basil
1 clove garlic
4 ounces shredded mozzarella cheese (or fresh, if you got it!)

Directions-
In a small bowl, combine bread crumbs, 2 tablespoons Parmesan cheese, 1 teaspoon oregano, salt, and black pepper.
 

Press tofu for 15 minutes or more to get some of the water out. Slice (knife parallel to shorter end) into 16 slices that will be around 1/4 inch thick.
 

Dip tofu slices into egg mixture, and then into bread crumb mixture and place on a well greased cookie sheet. Spray the slices with additional cooking spray.
 

Bake at 375 for 20 minutes or until golden and crisped, flipping half way through.
 

Combine tomato sauce, basil, garlic, and remaining oregano. Place a thin layer of sauce in an 8 inch square baking pan. Arrange 8 tofu slices in one layer in the pan. Spoon half of remaining sauce over tofu, top with remaining 8 slices of tofu (this time rotate the slices so they are perpendicular to the first layer's slices).

Top with the rest of the sauce, mozzarella, and remaining 3 tablespoons Parmesan.
 

Bake at 400 for 20 minutes. 

 My directions are kind of exact, but this is how I got a really, really good Tofu Parmesan so I think it's best I share what I did exactly. Between the three of us, we ate the whole thing. The breaded tofu tastes SO good and I bet could fool some people into thinking they're just eating chicken. The recipe as written on All Recipes would definitely not have worked as well (I noticed most of the reviewers did not follow the directions either) so I'm glad I changed it up.

I served it with whole grain bread and salad. I made a garlic butter with Brummel & Brown mixed with a bunch of goodies like fresh garlic, garlic powder, Italian seasonings, and salt. I felt so Italian with this meal :P

And yes, I would go so far as to say this is the best tofu dish I have ever made. It was really easy to make, too!
***
The other day, it was just me and my mom for dinner so I suggested to her that we try out one of the Annie's Mac and Cheese boxes that I bought at Sprouts a while ago. I was intrigued by a boxed mac and cheese (that used to be a childhood staple) that had a great ingredient list, used whole wheat pasta, and was white cheddar instead of orange! 
Even though I should have just made the box as directed so I could see how the actual product tasted, I wanted to spice it up a bit. Especially since my mom isn't a fan of mac and cheese so I wanted to give it a bunch of flavor. I doctored it up by added hot sauce, creole seasoning, cayenne pepper, pepper, red chili flake, and salsa. Yes, we like things spicy over here in Texas :D

Also, to bulk it up so it's not just pasta, I added two "Jumbo" sized veggie dogs from Light Life. I just cut them into bite sized pieces and sauteed them with a little olive oil so they could brown up a bit before being added to the pasta.
The verdict? This pasta is yummy! I tried a bite before I went all spice crazy and it tasted great. The veggie dogs worked out really well in this, too. The only thing I could find wrong with it is that it needed a lot more milk then the box said to use; the pasta wasn't very saucy. After I added more milk it was perfect. I probably wouldn't buy this again solely because I would probably never use it..I like creating meals so I always have ideas of what to eat. But for someone who is stuck in a rut or needs something to feed their kids, this is definitely a great choice.

And to keep the pasta trend going I have one more dish I would like to share...
Whole wheat orzo salad!
I used this recipe from How Sweet It Is that is a whole wheat orzo salad with grilled chicken and sweet and tender roasted vegetables. Jessica's recipe is super simple but creates such complex flavors. I will be making this again and again!

Whole Wheat Orzo with Grilled Chicken and Roasted Veggies
2 cups whole wheat orzo (uncooked)
3 grilled chicken breasts, chopped into pieces. (I used two large ones)
1 tomato (I used two plum tomatoes)
1 green pepper
1 red pepper (I also added some more bell pepper)
1 vidalia onion
2 cloves garlic
1 tablespoon olive oil
2 tablespoons balsamic vinegar
1/4 cup parmesan cheese
salt and pepper to taste

Preheat oven to 425.
Chop veggies and garlic into slices and place on a baking sheet. Sprinkle with olive oil, balsamic vinegar, salt and pepper. Roast for about 25 minutes, tossing vegetables occasionally.

Cook orzo according to directions. Drain, and place in a casserole dish. Add chopped grilled chicken on top. Add veggies. Mix pasta until everything is combined.

Sprinkle Parmesan on top. Toss a few times to incorporate. Serve hot.
---
I was a little heavy handed on the vegetables; who wants to miss out on all that caramelized goodness? I served the pasta salad on top of spinach because I thought the spinach would go really well with it.
Goodness gracious I loved this pasta dish. The tomatoes took on an almost sun-dried tomato flavor from the roasting and the balsamic vinegar glazed each and every vegetable with sweet goodness. I ended up having some leftovers with a couple cups of fresh spinach wilted down and mixed into the pasta and it was such a great addition! So next time, I will probably wilt a pound of spinach and mix it right into the pasta with all the rest of the veggies. Thanks so much for this amazing recipe, Jessica!


Goodnight!
<3


Thursday, February 17, 2011

The Sweets

If you're looking for ideas for a good dinner for tomorrow night, this is not the post for you. This post is strictly sweets...and healthy breakfasts disguised as treats. There might be so much chocolate in this post that you could possibly fall into a chocolate comma just looking at these pictures. Viewer discretion is advised.

Valentines day is a day to appreciate your significant other, but for me Valentine's day is all about chocolate and strawberries.
Of course, you have to have the classic chocolate covered strawberries...
I used a mixture of dark chocolate and unsweetened for super darkness. Toppings included cocoa nibs, toasted coconut, and toffee bits! My favorite goes to the toffee bits. And this is wayyy cheaper than buying a dozen at the store. The strawberries cost $2 (and I didn't even use all of them to make these) and the rest of the ingredients I already had on hand. A lot like this can cost 20 bucks at the grocery store! Also, this way you don't have to worry about hydrogenated oils or iffy ingredients. Just strawberries and chocolate.
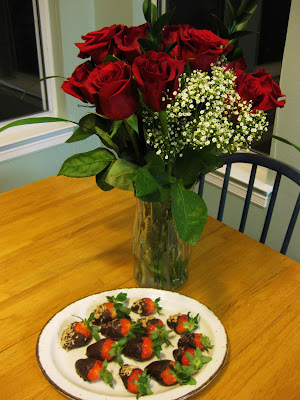
Posing with the roses.
My second ode to the classic was in the form of ...chocolate cake!!
Okay. Woah, now. Stop the presses. You probably weren't expecting this. That's right; I made a huge cake. For no reason.
The cake had (that's right, its all gone) a strawberry filling along with being garnished with strawberries (and the last chocolate covered strawberry) to keep the theme goin'. I really love this cake because its a lot healthier then the average cake and I experimented making a vegan frosting! And what takes it all home is that this is THE best cake I have EVER made. Dying to see the inside?
Uber moist, uber chocolatey, just the right amount of sweetness, absolutely to DIE for.
For the cake part, I actually used a "Chocolate-Pumpkin Bundt Cake" recipe from Eating Well. Everyone that reviewed it said they loved it and that the cake was super moist but that the pumpkin flavor didn't come through. Fine by me! In this recipe, I didn't mind that the flavor of pumpkin wasn't there because it came out as a really, really good plain ol' chocolate cake. I stayed with the recipe this time because I've had problems with cakes in the past when I try to deviate too much. The only difference was that I (obviously) didn't make this in a bundt pan and I didn't use the glaze listed for the top.

To Die For Chocolate Cake
Ingredients:
1 cup all-purpose, flour
3/4 cup whole-wheat pastry flour
1 cup granulated sugar
3/4 cup unsweetened cocoa powder, (not Dutch-process)
1 1/2 teaspoons baking powder
1 1/2 teaspoons baking soda
1 teaspoon pumpkin pie spice (I omitted)
1/4 teaspoon salt
1 cup nonfat buttermilk
1 15-ounce can unsweetened pumpkin puree
3/4 cup dark brown sugar, packed
1 large egg, at room temperature
1 large egg white, at room temperature
1/4 cup canola oil
1/4 cup light corn syrup (I will try brown rice syrup next time)
1 tablespoon vanilla extract

To prepare cake: Preheat oven to 350°F. Coat two 8 inch cake pans with cooking spray and dust with cocoa powder.

Whisk all-purpose flour, whole-wheat flour, granulated sugar, cocoa, baking powder, baking soda, pumpkin pie spice and salt in a medium bowl.

Blend 1 cup buttermilk, pumpkin puree and brown sugar in a large bowl with an electric mixer on low speed.

Beat in whole egg and egg white. Stir in oil, corn syrup and vanilla. Gradually add the dry ingredients, stirring until just combined. Transfer the batter to the prepared pans.

Bake the cake until a wooden skewer inserted in the center comes out with only a few moist crumbs attached, 40 to 45 minutes. Let cool on a wire rack for 15 minutes. Remove from the pan and let cool completely on the rack.
***
Now that you have the basic cake down, you can dress it up however you like. My strawberry filling consisted of 7 ounces (by weight) of frozen strawberries and 1/3 cup all fruit strawberry jam. I just heat it up on the stove for a little bit and add some corn starch to thicken it up enough so it doesn't sploosh all over the sides when you put the other half of the cake on top.
***
I was on the search for a great, fudgy, lower fat icing when I came across a vegan fudge frosting that I really liked. I didn't measure how much this makes but my guess is around 3 cups. It was able to frost this huge cake with over 1/2 cup left over.

1 1/2 cups water
1 1/2 cups granulated sugar
3/4 teaspoon salt
6 tablespoons cocoa powder (dark is great)
9 tablespoons corn starch (next time I'm going to try to decrease this to 1/4 cup and see how it goes)
1 teaspoon vanilla
3 tablespoons oil (preferably coconut oil)

Mix together sugar, salt, cocoa powder, and cornstarch in a medium sized sauce pan. Add water and cook, stirring continuously, on medium heat until mixture comes to slight boil. Cook until mixture is thickened (but not thickened completely because it will thicken more as it cools). Remove from heat and let cool for a few minutes. Stir in oil and vanilla. Let cool before frosting cake.

I love how this only has 3 tablespoons of oil in the whole batch! This frosting isn't super sweet, which I love; and the chocolate flavor is so dark. This will definitely be my go to frosting from now on, but I'm going to attempt using less corn starch next time because 9 tablespoons is way too much! I can't wait to frost some cupcakes with the extra :D

And boy, does this frosting have fudge factor!
I let the cake have a photo shoot with the flowers as well.
Those red envelopes are valentines cards my parents gave each other. Awhhh...
And whats that golden box you ask? That would be pure crack my mom, my sister, and I found at Costco.
Dark chocolate cheesecake fudge. We all got a sample and couldn't get over how amazing it was so my mom decided to get a package for my dad for Valentines Day. Best decision ever.

But really. How can you beat a cake that is made with almost half whole wheat flour, only a quarter cup of oil, a whole can of pumpkin,with a frosting that only has 3 tablespoons of oil? You can't. And as the saying goes- if you can't beat em, join em.
Well, that doesn't make sense; but you get the picture... Try out this cake, for realz!
****
Next up on the chocolaty agenda is a Chocolate Zucchini Roll!
I actually made this a while ago but just never got around to blogging about it. Not because it wasn't good enough, trust me, because this baby was GOOD!
I modified the Taste of Homes recipe to transition it from cake to breakfast :D

Chocolate Zucchini Roll
 Ingredients:
3 eggs
1 teaspoon vanilla extract
1 cup whole wheat flour

1/2 to 3/4 cup sugar
1/2 cup baking cocoa
1 teaspoon baking soda
1 teaspoon ground cinnamon
1/4 teaspoon salt
1 cup (packed) shredded peeled zucchini
 
Filling:
4 ounces light cream cheese
1/3 cup powdered sugar
1 ½ tablespoons Brummel & Brown
½ teaspoon vanilla
 
Directions
Line a greased 15-in. x 10-in. x 1-in. baking pan with waxed paper. Grease the paper; set aside. In a large bowl, beat eggs for 3 minutes. Gradually add sugar; beat for 2 minutes or until mixture becomes thick and lemon-colored. Stir in zucchini and vanilla. Combine the flour, cocoa, baking soda, cinnamon and salt; add to egg mixture until well blended. (batter will be thick).

Spread batter evenly in prepared pan. Bake at 350° for 10-15 minutes or until cake springs back when lightly touched. Cool for 5 minutes. Invert onto a kitchen towel dusted with cocoa. Gently peel off waxed paper. Roll up cake in the towel jelly-roll style, starting with a short side. Cool completely on a wire rack.

For filling, in a large bowl, beat cream cheese, butter and vanilla until fluffy. Beat in confectioners' sugar until smooth.

Unroll cake; spread filling evenly over cake to within 1/2 in. of edges. Roll up again. Place seam side down on a serving platter. Dust with confectioners' sugar. Cover and refrigerate for 1 hour

---
Oh wow. This was just like how I imagine chocolate heaven to be. I felt absolutely sinful having this type of delishery for breakfast. I think that a great addition might be to add some peppermint extract to the filling. It would taste like a thin mint!
If you were to ask me if I liked this roll or my pumpkin roll better I would say its a tie. I like them for different reasons. The pumpkin roll seemed a lot more light and cake-like while this one was a little more dense and almost brownie-like. They both have hidden nutritious vegetables, which is a plus. And both relatively low in fat. Its a toss-up!
 SO chocolaty and moist. Unlike the pumpkin roll, which was best straight from the fridge, this roll was best after being nuked for 10 seconds in the microwave. This was SUCH a treat; absolutely divine! (can you tell I loved it?)

****

Last but not least, just yesterday I made Raspberry Almond Truffle Bread from Sugar Plum. The name "truffle bread" intrigued me so I took a gander. I was surprised to see that this bread uses no added sugar or oil! The oil for the bread comes in the form of chocolate almond butter and the sweetness comes from raspberry jam and dates.
Raspberry Almond Truffle Bread 
1 cup chopped dates
1/2 cup water
1 3/4 cups all purpose flour (I used whole wheat pastry)
1/4 cup unsweetened cocoa powder
2 teaspoons baking powder
1 teaspoon baking soda
1/4 teaspoon salt
3/4 cup chocolate almond butter (homemade)
1/2 cup raspberry preserves
1 large egg
1/2 teaspoon vanilla extract
1/2 cup buttermilk
1 cup raspberries (frozen)
1/2 cup dark chocolate chips
2 tablespoons slivered almonds (sliced)

Heat oven to 375 degrees F. Coat a loaf pan with cooking spray and lightly dust with flour.

Bring dates and water to a boil in a small saucepan over medium heat; cook 2 minutes, or until dates are softened.

In a medium mixing bowl, sift together flour, cocoa powder, baking powder, baking soda and salt. In a large mixing bowl, using a mixer on medium speed, beat almond butter, raspberry preserves and date mixture for 1 minute or until well combined. Beat in egg and vanilla until combined. Reduce mixer speed to low and gradually beat in flour mixture alternating with buttermilk until just combined. Stir together an additional tablespoon of flour and raspberries until well coated; stir raspberries into batter along with chocolate chips.

Smooth batter into pan; sprinkle with almonds and a few extra chocolate chips if desired. Bake 40-45 minutes or until well risen, fragrant, and golden brown around edges. Cool on a wire rack before slicing.

Makes 1 loaf

Emily used Maranatha Dark Chocolate Almond Butter, which I can guess is a lot sweeter then the one I made, I also had low sugar raspberry preserves, so that was less sweet too.  But since I always cut down on sugar in most of my quick bread recipes, I figured this would probably produce a just-right loaf on the sweetness scale.
Obviously this is not sugar free since there was sugar in the preserves, sugar in the chocolate chips, and sugar in my almond butter but it was very low in added sugars. I love how the gooey dates just disappeared into the bread!
This morning I cut myself a piece:

I love those little pockets of raspberries that absorbed into the bread so that you just get a delicious bite of raspberry infused bread every once in a while.
Truffle bread indeed. Need a chocolate fix? This will take care of it, for sure. 
This bread was the perfect sweetness for someone like me but my dad thought that it was just slightly not sweet enough. It was so fudgy! Or shall I say truffley? Either way, it was a winner winner chicken dinner at this house.  
This bread has a real staying power. Its not light, but I like it that way. The almond butter really adds to the satiety.  
My only gripe? Mine turned out kind of crumbly. I'm guessing it was probably due to the fact that I didn't use commercial almond butter (mine is a bit more thick) so that could have been the problem. I couldn't pick up a piece without it falling all over the place. The weird thing is that its nice and moist but crumbly at the same time. I'm wondering if something like 1/2 cup raspberry puree might help or not. Thoughts?
Regardless, this recipe is definitely going in the recipe file!

And to squeeze every single drop of chocolate out of this post, I'm posted a picture of a dark chocolate "Maya Gold" bar I got FREE from Sprouts!
The company is Green & Black and they have a line of all organic chocolate bars ranging from white chocolate to 85% dark chocolate! I was sent a coupon in the Sprouts e-newsletter for one free chocolate bar and you can bet I took full advantage of it. Who wouldn't want a free chocolate bar? Sprouts didn't carry all of their flavors, but I knew I wanted to get one of their dark chocolate varieties. The one I ended up getting had a "twist of orange and infused with spices". SUPER GOOD Y'ALL! High quality chocolate is where it's at. :D

***
I don't know; did I cover enough chocolate in this post? I sure hope so because tomorrow I'll be giving y'all a break from all that sugar and talk about some savory flavors.
Yay for Fridays! 
PS- we would of had school off tomorrow thanks to that unexpected snow day...*sigh*

Saturday, February 12, 2011

Dark Chocolate Cups!

Okay, so I've kept you guys waiting long enough! It is time to share this epic dessert..
I got the idea to make these peanut butter cups when I couldn't decide on which one dessert to make from a list I made of chocolate related desserts for my family. I wanted to make them all equally, and everyone else thought that all of them sounded equally delicious!
Here was the list:
-Salted dark chocolate covered homemade caramels
-Dark chocolate "Almond Joy"s
-Peanut butter cups
-Pretzel & crunchy peanut butter balls covered in dark chocolate

All of them sound delicious, right?!
Well luckily I could narrow down my choices simply because we didn't have some ingredients necessary to make them. I didn't have enough coconut to make the almond joys and we didn't have heavy cream to make the caramel. And then I thought, why don't I just combine some of them into one?
And so the salted dark chocolate peanut butter pretzel cups with caramel was born!
But Carlyn, I thought you said you had no cream to make caramel? Ah, yes, but you see, I had caramel candies that I could melt with some milk to make a gooey caramel layer. And, this way I didn't have to mess with making my own caramel, because you know my previous successes with that..

I was getting rather giddy thinking of this marvelous concoction and set out to make them. They disappeared far too quickly, but that only gave me the excuse to make them again so I can finalize the recipe to share with you guys :D

Okay, okay, enough talking...on to the recipe!!
You will need:
For the base-
5 ounces bittersweet chocolate
1 ounce unsweetened chocolate
12 silicone muffin cups

For the peanut butter filling:
1/4 cup natural or homemade creamy peanut butter
1/4 cup natural or homemade crunchy peanut butter
1/4 cup chopped pretzel peices
1 to 3 tablespoons powdered sugar
1/4 teaspoon vanilla extract

For the caramel layer:
3 ounces (by weight) caramel candies
3 tablespoons milk or water

For the top:
2.5 ounces bittersweet chocolate
.5 ounce unsweetened chocolate
kosher salt

It seems like a lot of ingredients but its mostly stuff you probably have lying around the house (except for maybe the caramel, which can be substituted for homemade caramel sauce).
The caramel candies I used have a pretty "good" ingredient list compared to other ones I saw in the store..
Yes, yes, there's corn syrup in there but the other brands I saw had ingredient lists 30 miles long and included random additives and hydrogenated oils...yuck!
I got to use the silicone cups my mom gave me which worked wonders in this recipe. I put them in a 9x13 pan for portability.

Okay so on to the process...
First melt 5 ounces bittersweet chocolate and 1 ounce unsweetened chocolate in the microwave, stirring every 30 seconds.
Place about 2 teaspoons of chocolate into each muffin cup, pushing the chocolate up the sides. You will use all of the chocolate.
Put the pan into the fridge while you make the peanut butter filling.
Mix all the peanut butter filling ingredients together except for the powdered sugar. Start off my adding a tablespoon of powdered sugar and then add half a tablespoon at a time until the peanut butter mixture is dry but not crumbly. You want to be able to stir it but be pretty thick. This all depends on your peanut butter but I'm guessing that around 2 tablespoons will get you there.
a little drier then this and you're golden.
I needed to add a little bit more this time around (the first time I made them I added 1/4 cup powdered sugar and it was too dry). Don't worry about it too much, though, because either way they come out amazing (:

Add a little less than a tablespoon of the peanut butter filling into each cup.
In a saucepan over medium-low heat, melt the caramels with milk, stirring occasionally, until the sauce is smooth.
Cool the caramel sauce until its no longer hot (warm to the touch is fine) but not cooled completely. Add about 1/2 tablespoon of sauce to each cup.
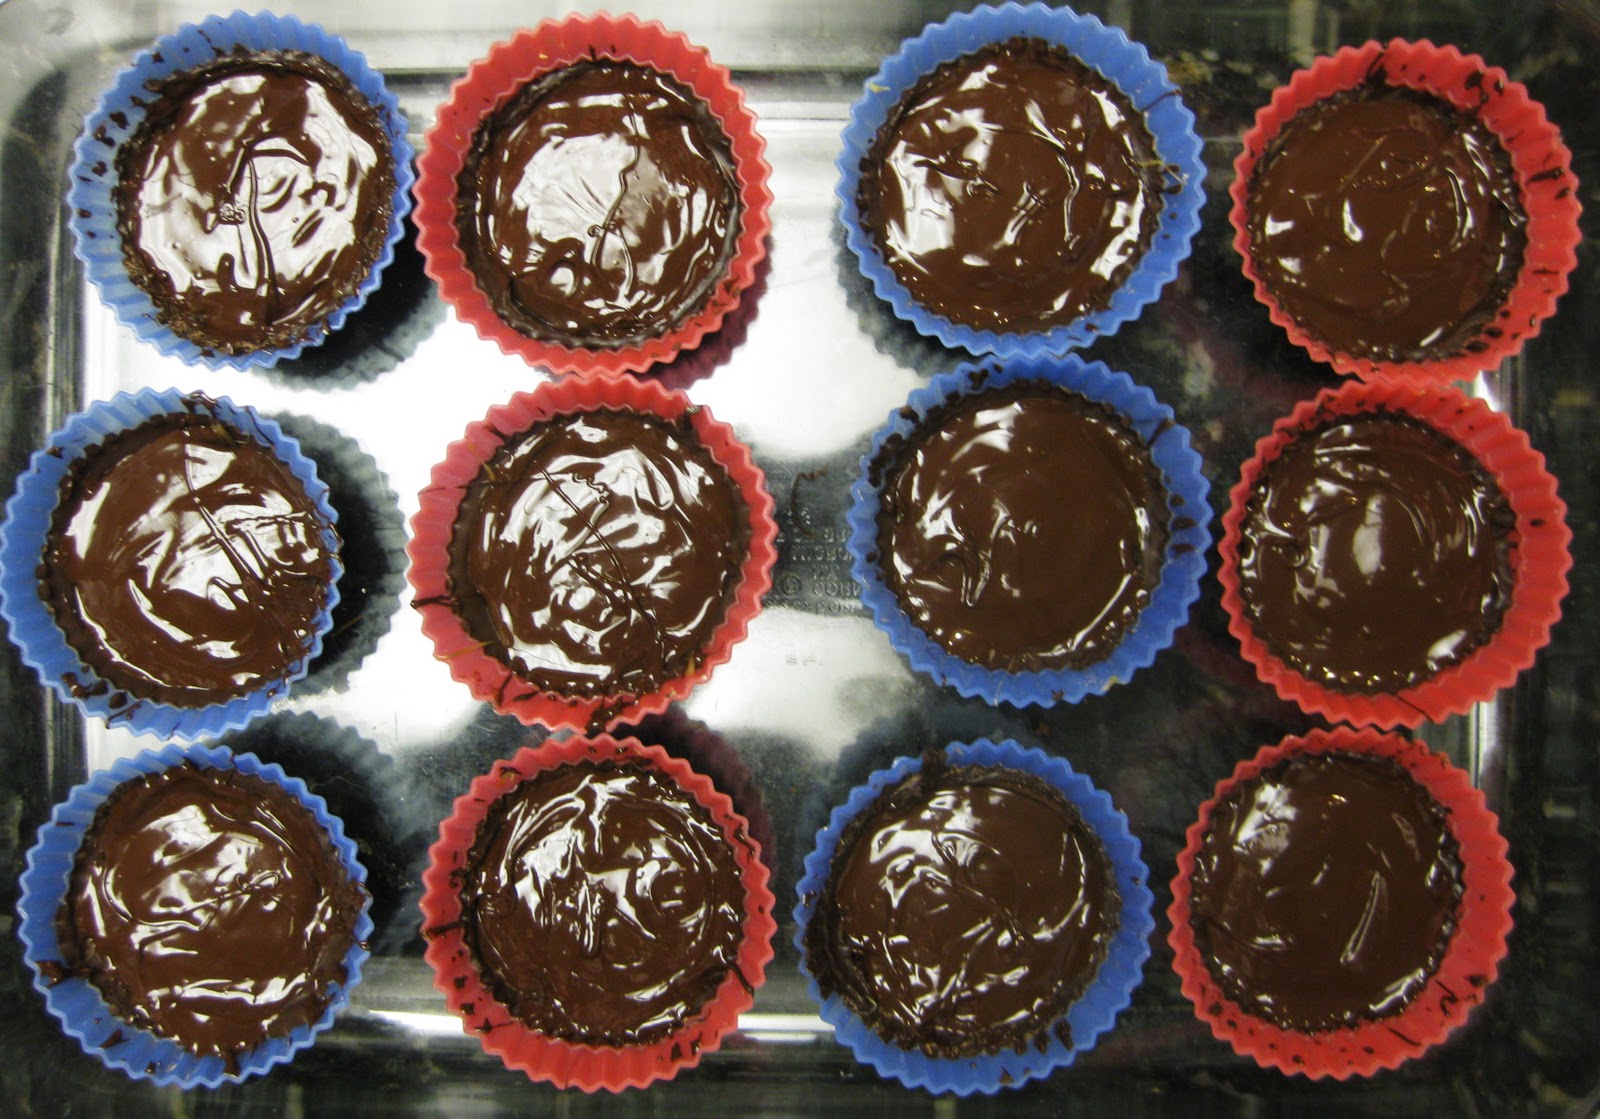
Melt remaining chocolate (2.5 ounces bittersweet, .5 ounce unsweetened) in microwave and add a good blob to each cup. Smooth the blob out so that it touches the ridges and seals the innards.
You may not need all of the chocolate.
Sprinkle each cup with kosher salt-
and refrigerate for about 15 minutes or until the chocolate has hardened completely.
Now this is were silicone cups come in handy...all you have to do is peel the cups off! No mess,no fuss, and no waste!

The mixture of bittersweet chocolate and a little bit of unsweetened chocolate makes for super dark, melt-in-your-mouth chocolate.
I know you're just dying to see the inside....
BAM!
The flavor combo reminds me of snickers, but soooo much better. Salty, sweet, smooth, gooey, crunchy, YUMMY!
What else do I have to say to convince you to make these A-S-A-P?! PLEASE do, you will not be disappointing...let me know how it goes!

PS- you may have noticed the colors of the muffin cups changed places almost every other picture...just ignore that :P

Thursday, February 10, 2011

Superbowl: its all about the commercials and the APPETIZERS!

I was pretty pumped for the superbowl. Not because of the epic battle between two football teams, but because this meant I could make fun food and watch commercials.

The commercials ended up being a flop, but the food was another story! I decided upon making bruschetta, bacon wrapped dates, and 7-layer dip. And although I label these "appetizers", these ended up being our dinner, which was the intention anyways.

And who are we kidding, of course I put a healthier spin on these babies! I set out to make the 7 layer dip earlier in the day so it could chill and mingle in the fridge for a couple hours. Here's the ingredients:
Layer one: 1 16 ounce can organic fat free refried beans mixed with one 4 ounce can diced green chiles
Layer two: 1 cup guacemole
Layer three: 1 cup low fat greek yogurt mixed with 2 teaspoons taco seasoning
Layer four: 1 cup low fat shredded cheese
Layer five: 1 cup diced tomatoes
Layer six: 1/4 cup chopped green onion
Layer seven: 1/2 cup sliced olives

Seven layers! And really, not too bad nutritionally.
The beans:
Guacamole. I used 1 1/2 avocados, lime juice, chunky salsa. and a little salt (and cilantro if I had some).
It was more then a cup but who doesn't love a little extra quac?
Greek yogurt layer. The taco seasoning really permeates throughout the whole dip, once you eat it all together. I wouldn't skip it!
The cheese. I really don't like using reduced fat cheese because I'd rather just use less of the good stuff since it never melts right, but in this case melting wasn't an issue and since it was sharp cheddar, it had a lot of flavor.
Diced tomatoes! I used more than a cup. The more veg the merrier.
Green onions:
Olives:
YUM! The four of us demolished 7/8 of this pan...well hey, it was our dinner!
I served this with tortilla chips for the fam and ate mine with homemade baked tortilla chips I made from La Tortilla Factory whole wheat tortillas that I sprayed with a little oil, sprinkled with salt, and baked at 400 for about 15 minutes.
I loved this!! I can't wait till I have an excuse to make it again :P

And then...bacon wrapped dates! Okay, I know what some of you are thinking... "ewwww!" But for serious, it's a killer combo.
I didn't really "healthify" this one, except for using center cut bacon, but that's okay.
And the surprise?
They're stuffed with almonds!
peek-a-boo!
The almonds roast in the oven and the whole thing is just melt in your mouth.
All you do is cut bacon slices into thirds, stuff raw almonds into pitted dates (its easy since there's already a hole where the pit was) and then wrap the bacon around each date. I like to secure them with a toothpick and then put them on a cooling rack and then on a cookie sheet so that all the fat drippings drip onto the sheet and don't just pool around the date. Bake em at 375 till they look good  and crisp (around 30 minutes) and they're done! These are good for making ahead and just baking them right before the event.
If you want an appetizer that everyone (well, except for the vegetarians) will love you for bringing, this is it. So simple; only three ingredients, and prep takes 5 minutes at most!

And lastly, I made bruschetta! I made a whole wheat french baguette using the same recipe I used for the french bread I made in this post which turned out well but still not like a french bread should be. The crust still isn't crisp enough and there isn't big enough holes. It still worked just fine for my bruschetta, though!

I grilled up slices of my baguette and then topped it with a classic: pesto, fresh mozzarella, and tomato!
I got fresh mozz at Costco for super cheap, and now have a whole pound and a half leftover for something else! (ideas?)
These were little bites of heaven. So fresh!

And to end the meal, we had low fat brownies! (With a little low fat mint chocolate chip ice cream)
I used a recipe I found over at Mama Pea's blog. They're made with applesauce yet still have that fudgy texture that is usually lost when applesauce is used. I was expecting a cakey brownie, but this was far from it!

I made a couple changed to ensure maximum fudgey-ness:
3/4 c. whole wheat pastry flour
1/3 c. cocoa powder
2 teaspoons instant coffee
2 t. baking powder
1/2 t. baking soda
1/2 t. salt
1 c. unsweetened applesauce
1/3 cup combo of half maple syrup(or brown rice syrup) and half sugar
1 1/2 t. vanilla
1/2 c. chocolate chips (I used a combo of mini reese's cups and mini caramel-filled turtles because, well, who wouldn't if you had those laying around?!)

1)Preheat oven to 350 degrees.  In a large bowl, combine flour, cocoa, baking powder, instant coffee, baking soda and salt.
2) In a smaller bowl, combine applesauce, sugar/maple syrup and vanilla.
3) Add wet to dry and mix until just combined.  Fold in chocolate chips.
4) Pour batter into an 8×8 pan that has been sprayed with cooking spray.
5) Bake for 20 minutes or until brownies are set and edges are coming away from the pan. Let cool before cutting.

 I made these in a slightly different sized pan that was rectangular so they cooked in a little less time and were a bit thinner.
Wow! These guys are totally different then any other applesauce/lowfat brownie I've ever had. They are so fudgy and absolutely delightful. This will definitely will be my go to brownie from now on!
And I love how it uses whole wheat flour :D The pan of brownies was gone far too quickly....

We really needed all of this good food to keep our morale up with the awful half time show and the endless car commercials...

That's all for now!
I'll have the chocolate cups recipe up (hopefully) by tomorrow, so be prepared for the most epic dessert you've ever had y'all!!!
Night!