Tuesday, May 17, 2011

How to make THE BEST Homemade Graham Crackers

I see so many delicious recipes that call for graham crackers (or more frequently, graham cracker crumbs) which usually puts me in a conundrum.

You see, all of the non organic/natural graham cracker brands I have seen have contained quite hideous ingredient lists.

For example (Honey Maid)-
UNBLEACHED ENRICHED FLOUR (WHEAT FLOUR, NIACIN, REDUCED IRON, THIAMINE MONONITRATE {VITAMIN B1}, RIBOFLAVIN {VITAMIN B2}, FOLIC ACID), GRAHAM FLOUR (WHOLE GRAIN WHEAT FLOUR), SUGAR, SOYBEAN OIL, MOLASSES, HIGH FRUCTOSE CORN SYRUP, PARTIALLY HYDROGENATED COTTONSEED OIL, LEAVENING (BAKING SODA AND OR CALCIUM PHOSPHATE), SALT, SOY LECITHIN, SULFUR DIOXIDE ADDED TO PRESERVE FRESHNESS. 

As much as I love ingesting high fructose corn syrup and partially hydrogenated cottonseed oil, I think I'll pass....

And then I go to the natural food store or the organic section and I notice that these graham crackers almost always cost double the price and taste like cardboard.
And yet, I make the sacrifice and buy the extremely expensive cardboard and use it in said recipes. Yum.

Well, I have found an alternative that isn't as easy as buying the store bought kind, but way tastier and takes a minimal amount of time from start to finish.

I come to you with a recipe from Alton Brown and if you follow the measurements exactly (okay, well maybe just one minor tweak) then you will be awarded with the most tantalizing graham crackers ever known to man.

I mean, come on, it comes from Alton Brown! (which, on a bit of a side note, has canceled his show Good Eats!!! NOOOOOOOO)

First you want to start with your dry ingredients (Scroll down for the exact measurements). Just plop them all in the food processor!
The measurements are all by weight, so if you don't have a scale don't bother making the recipe. Seriously. Okay, well maybe MAKE the recipe, but if doesn't turn out don't blame Alton!

Pulse the dry ingredients until combined.
On the side you should have your "wet works" (as Alton would call them), molasses, honey, vanilla extract, and milk.
The honey wasn't a part of the original recipe, but I decided to go with half molasses and half honey after reading some reviewers comments.
You also want to have your (very cold) butter, cubed and ready. I put it in the freezer after I cubed it, got the rest of my ingredients together, and then took it out right before I was ready.
Once all your dry ingredients have been mixed together, add the butter into the food processor.
Pulse until the mixture starts to look like cornmeal, like this-
Now pour in the "wet works" (:
And pulse until the whole mixture comes together!
The key is to not over mix. The mixture will look dry, but don't worry. This is NOT the time to just turn on the food processor and walk away...NOT THE TIME!
Wrap the dough in plastic wrap and refrigerate for at least an hour.
The dough will turn from a dry, crumbly mess to a much more manageable form. But really, its best to keep it in there for 2 hours or more. The flavors meld and the dough becomes much more hydrated.

And now for the fun part! Rolling out the dough is semi mess-free when you place it between two pieces of parchment paper. No extra flouring involved.

I cut mine using a heart shaped cookie cutter for even baking, but you can just as easily use a pizza cutter to cut straight lines horizontally and vertically to create actual graham crackers.
Remove the grahams, place them on a parchment (or silicone) lined baking sheet, dot with a fork, and sprinkle with cinnamon-sugar! (Totally optional, but so worth it!)
Bake at 350 till they look browned and crisp. I can't remember how long mine took but I think it was around 10-13 minutes.
And ta-da!
These graham crackers are amazing. They keep well too! Even two weeks later they still had the same crispy, buttery crunch. One of the many secrets of this recipe is that it uses kosher salt. The last graham cracker recipe I tried didn't use kosher salt (actually, it called for no salt, but I added a bit of the normal "table" variety) and I could tell a huge difference.

Since I've made these graham crackers for the first time, this recipe has become my go to recipe...none other is worth trying! It definitely heightens the taste of anything you make that calls for graham cracker crumbs.

Enough talk, here's the recipe!
Alton Brown's Graham Cracker Recipe
Ingredients
8 3/8 ounces graham flour
1 7/8 ounces all-purpose flour
3 ounces dark brown sugar
3/4 teaspoon aluminum-free baking powder
1/2 teaspoon baking soda
1/2 teaspoon kosher salt
1/8 teaspoon ground cinnamon
3 ounces unsalted butter, cut into 1/4-inch cubes and chilled
2 1/4 ounces molasses (I used half honey and half molasses, recommended)
1 1/2 ounces whole milk (1% milk worked just fine for me!)
1/2 teaspoon vanilla extract
 
Directions
Place both flours, sugar, baking powder, baking soda, salt and cinnamon into the bowl of a food processor and pulse several times to combine. Add the butter and pulse until the mixture resembles cornmeal. Add the molasses (and honey), milk and vanilla extract and process until the dough forms a ball, approximately 1 minute. Press the ball into a 1/2-inch thick disk, wrap in plastic wrap, and refrigerate for 30 minutes (or longer).
Preheat the oven to 350 degrees F.
Unwrap the chilled dough and place it onto a large piece of parchment paper and top with a second sheet of parchment paper. Roll the dough out until it is 1/8-inch thick. Slide the rolled dough and parchment paper onto a half sheet pan. Remove the top sheet of parchment paper and cut the dough, using a rolling pizza cutter into 2-inch square pieces, by making vertical and then horizontal cuts all the way across the dough. Trim off any excess. Using a fork, poke holes all over the top of the dough. Leave the crackers on the pan and bake on the middle rack of the oven for 25 minutes or until the edges just start to darken. Remove from the oven, set the sheet pan with the crackers on a cooling rack and allow to cool completely. Once completely cool, break into individual crackers and store in an airtight container for up to 2 weeks.

As you can see, Alton chose a different method of baking his graham crackers, which probably works just great but the way I've been doing it has worked very well for me and takes much less time to bake since the pieces are separated. Whatever floats your boat!

These are great for just plain snacking, dipped in chocolate, with cream cheese frosting, as the base for a s'more (duh!), with nutella, crumbled for magic bars, cheesecake crusts, the possibilities are endless! (and the ingredient list ISN'T)

Holla!

Sunday, May 8, 2011

Whole Wheat Date Walnut Bread!

I love dates.
Gooey and sweet, they make for a perfect bite when combined with salty almond butter or when wrapped in smokey bacon.

But more importantly, I love baking with them! They provide a natural sweetness so you can cut down on the sugar and, of course, they have the added benefit of fiber along with other nutrients.

So when I saw this recipe from Healthy Food for Living for an "Autumn Date and Walnut Bread" I was ALL over it. The thing I loved most about this date bread was that it wasn't skimping on the dates! Surprisingly, the majority of "date" bread recipes I see will have a mere quarter cup or so of dates and still call themselves a date bread! That would be bread with dates, not date bread, in my opinion.

It's a gorgeous bread, inside and out.
Here's Lauren's recipe, with a few minor adaptions-
Autumn Date and Walnut Bread
Adapted from Healthy Food for Living
Ingredients:
  • 1 1/2 cups (7 oz) chopped pitted Medjool dates
  • 1 cup water
  • 1/4 cup unsweetened applesauce
  • 2 Tbsp pure maple syrup
  • 2 Tbsp packed dark brown sugar
  • 1 egg, lightly beaten
  • 1 tsp pure vanilla extract
  • 1/4 tsp pure maple extract (if you have it, I didn't)
  • 1 cup whole wheat pastry flour
  • 1 cup white whole wheat flour
  • 1 tsp baking soda
  • 1/2 tsp ground cinnamon
  • 1/2 tsp salt
  • 1/2 cup chopped toasted walnuts
Directions:
  1. Preheat oven to 350 degrees F. Lightly coat a 9 x 5 inch loaf pan with canola oil cooking spray.
  2. In a saucepan, bring 1 cup of water to a boil. Add roughly chopped dates and let the water come back to a boil. Take the pan off of the heat and let it sit for 10 minutes.
  3. Test the temperature to make sure the water/date mixture isn't too hot before proceeding: to the water and dates, add the applesauce, maple syrup, brown sugar, egg, and both extracts. Stir until well-mixed.
  4. In a medium bowl, combine the dry ingredients (flours through salt) and whisk until combined.
  5. Stir dry ingredients into wet just until moistened. Fold in the chopped walnuts.
  6. Spoon batter into prepared loaf pan and bake at 350 for 45-50 minutes, or until a toothpick inserted into the center of the bread comes out clean.
  7. Let cool in pan for 10 minutes, then transfer bread to a cooling rack and let cool before slicing.
 This bread is absolutely TO DIE FOR. The gooey dates practically melt into the bread and give it the perfect amount of sweetness and flavor. The occasional crunch of the toasted walnuts adds contrast to the soft nature of the dates while the bread itself has good structure and won't fall apart when you try to slice it.

The combination of the maple syrup, cinnamon, dates, and walnuts, with that molasses undertone makes for a FABULOUS autumn-themed bread! 

This bread not only tastes good but is good for you since it only has a small amount of added sugar, while also being low in fat and high in fiber. (:
I love that I got the pretty crack down the middle-
I couldn't decide which topping I was going to go with, so I just went with a half and half combo of dark chocolate almond butter and Brummel & Brown buttery spread-
This bread is so flavorful and delicious that adding an intensely flavored topping is so unnecessary. It was honestly best plain or with a dab of Brummel & Brown!

The only slight problem I had was that the ends were a bit on the dry side (the middle was perfect, though) so I might try baking at 350 and then lowering the temperature to 325 after it has developed its shell so that the inside doesn't dry out.

There is really no other additions or alterations I would make to this bread because it is really that perfect :D

***
And in other news, have you ever heard of Fruit Pearls?
 They are similar to Dippin' Dots in concept; a pearl shaped frozen treat. But they differ in what those pearls are made out of! As you could probably infer, Fruit Pearls are made of fruit instead of the normal ice cream fare.

This particular flavor also has the addition of yogurt to act as the "cream" component. They have other flavors, but this particular one caught my eye when I saw it (on sale!) at Sprouts.

The ingredient list isn't short by any means; but the ingredients look innocent! Each flavor has slightly varying nutritional information, but this one is 70 calories, 0 grams of fat, 4 grams of fiber, and only 8 grams of sugar! That's pretty good for a sweet treat.
I opened it up and was slightly surprised at what I saw-
I was confused what those little yellowish oval-shaped "dots" where, but it turns out those are actually just real pieces of tangerine! I took a bite and was (again) surprised at how good it tasted. The red pearls where like tiny bites of berry sorbet while the white dots added creaminess and the citrus finished it off with a little tang. I like!

These cups are only a little over 3 ounces big, so I didn't think it would satisfy my sweet tooth and that I would probably gobble it up in seconds. This actually took me a good 10 minutes to eat! It was definitely a worthy product to try. (This is not a paid advertisement)

The only thing that would keep me from stocking up on these as a freezer staple is the price! They're over $7 for a pack of 4 which is just a little too much. I got them on sale for $3.99 which is a price I think is much more adequate.

It was fun to try it out though; I'm definitely going to stock up on another box before they raise the price!

Now I'm off to prepare my mom the dinner she requested!
What are you doing for mother's day?

Tuesday, May 3, 2011

THE BEST Cookies I have EVER Made: Chocolate Chip Oatmeal Toffee Cookies w/ Pecans!


I am about to share with you a cookie recipe that just might blow your mind.
You’d think I’d be tired of cookies because of my week long chocolate chip cookie experiment but no! When a cookie is made right, you never can have too many (:

This particular cookie is unlike the plethora of chocolate chip cookies I had in the fact that this recipe produces a cookie 20 times better. YES, I said 20 times!!

THIS cookie blows any other cookie I've ever eaten OUT OF THE WATER. 
I'm serious, there is just no way for me to express how much I love these cookies. 

And though I call this a "chocolate chip oatmeal toffee" cookie, I wouldn't really call it an oatmeal cookie. The truth is, I'm not a huge fan of oatmeal cookies! The oats in this recipe are finely ground (into oat flour) so that you get that same lovely taste and a bit of chew without it being too "oatmeally".

The simple oat and flour base is then pumped up with toffee bits, toasted pecans, and dark chocolate chips to give you a flavor profile that is out of this world.
Convinced yet? 

I found the recipe originally from Cookie Madness (who, unfortunately, as come down with pneumonia! I hope you feel better, Anna!) where she originally got it from here. She made a couple of changes to that recipe, and I made a couple of changes to her recipe, so here is my version!

Crack Cookies (or the more kid-friendly name: Chocolate Chip Toffee Pecan Oatmeal Cookies)
1 cup all purpose flour (4.5 oz)
1/2 teaspoon baking powder
1/2 teaspoon baking soda
1/2  teaspoon kosher salt
4 oz (1 stick) unsalted butter, softened
1/4 cup granulated sugar*
3/4 cup packed light brown sugar (*or 1/2 cup + 2T white sugar and 1/4 cup + 2T dark brown sugar if you don't have light)
1 egg
2 teaspoons imitation vanilla extract
1 cup dark chocolate chips
3 oz Heath toffee bits (a scant 1/2 cup)
3/4 cups pecans, toasted and chopped
1 1/8 cups oatmeal ground into a fine powder in the food processor (or 1 cup oat flour)

Mix flour, baking powder, baking soda and salt, set aside.

Cream butter and sugars in large mixer bowl. Add egg and vanilla and stir until mixed.

Add flour mixture and oatmeal gradually, stirring until incorporated. Stir in Heath Bits, Chocolate Chips, and nuts. Cover and chill for at least 2 hours.

Place 8 or 9 balls of cookie dough (I made mine 45 grams each or about an 1/8 of a cup if you don't have a scale) on a parchment lined cookie sheet and flatten slightly . Bake at 375 degrees for 9-11 minutes or until golden and slightly browned around the edges. Let cookies cool on the cookie sheet for 5 minutes and then transfer to a cooling rack.

Makes 19-21 cookies

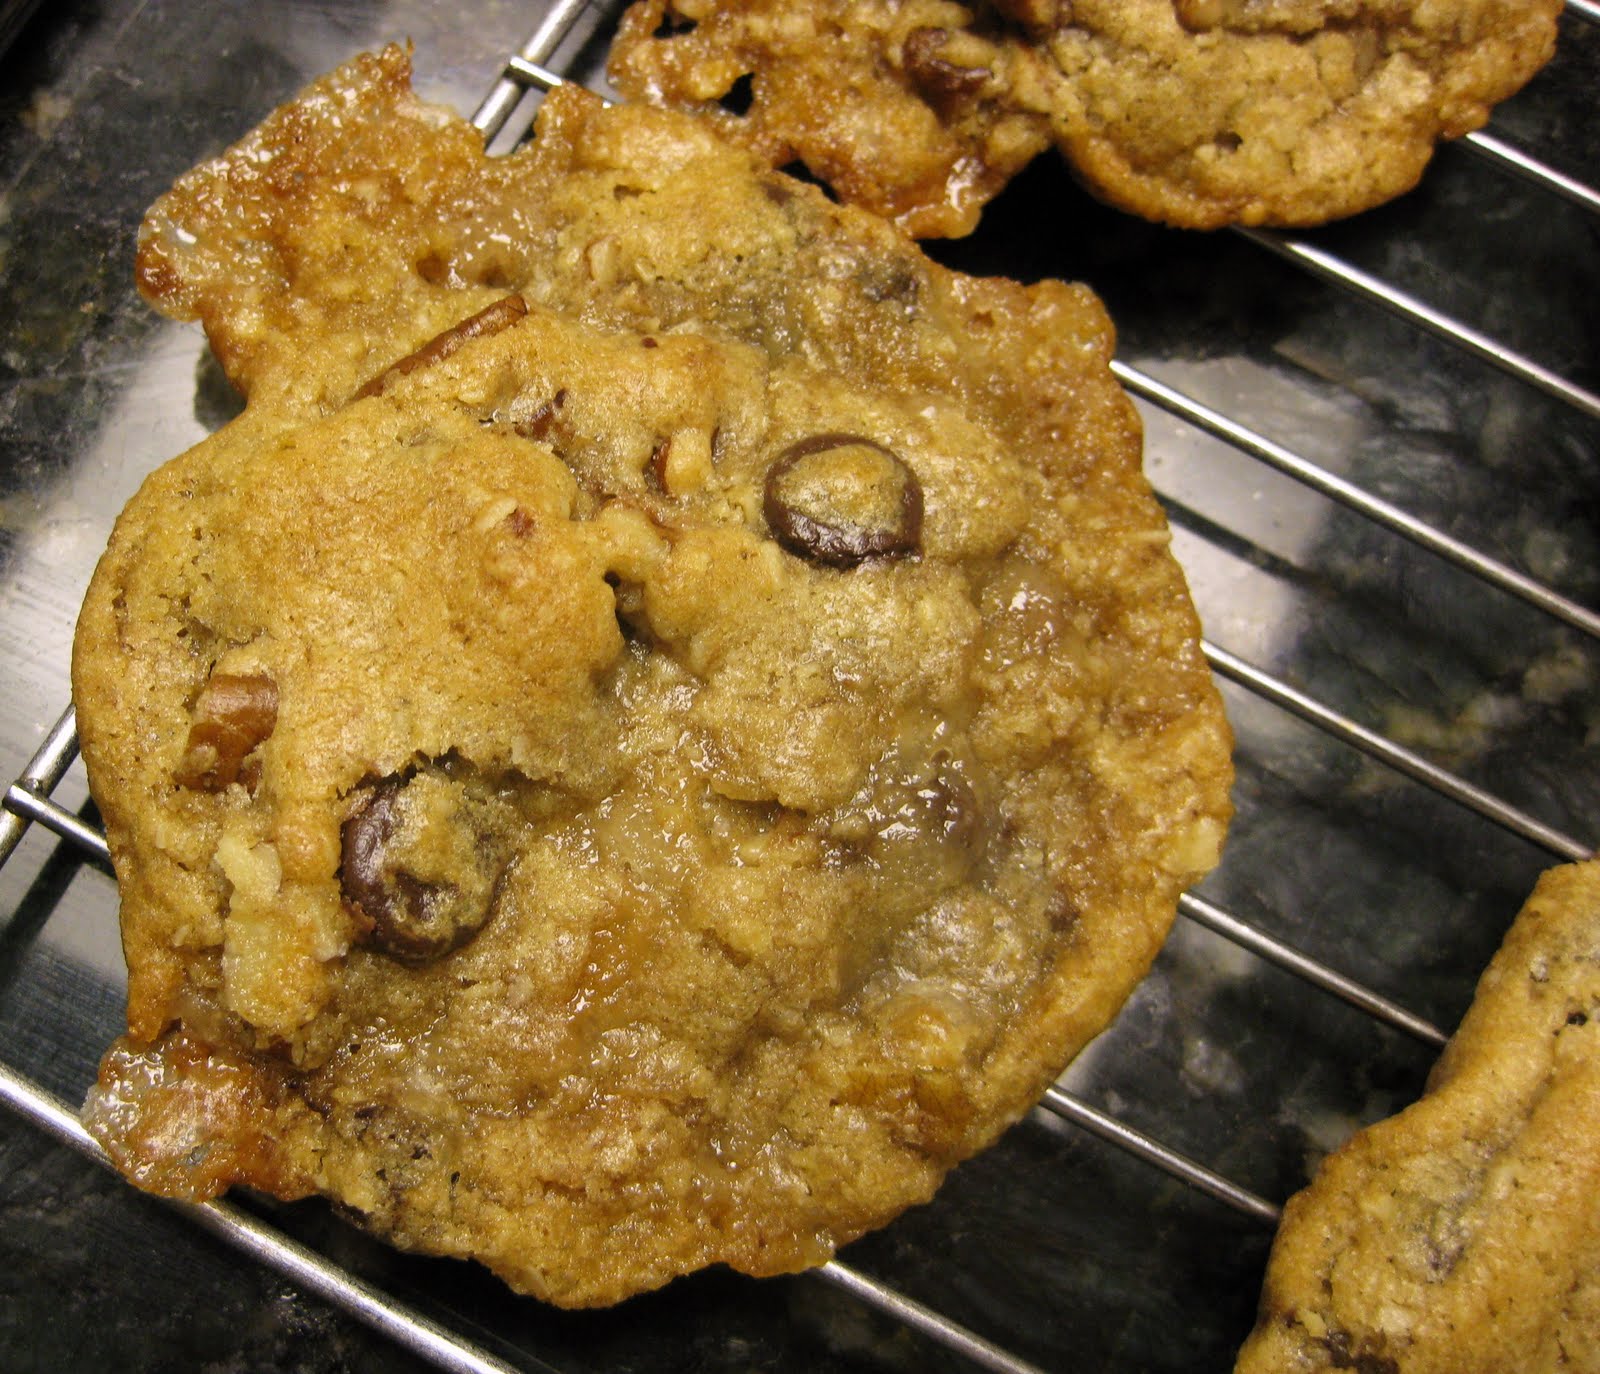
See that goo in the above photo? Yeah, that's not underdone or anything, that just how the cookie is. These are cookies that don't turn all brittle and stale the day after you make them; in fact from the words of my brother "what did you do to make these cookies stay so moist and fresh?!"

I've made these cookies twice (only days after each other, mind you) and the first time I had to substitute some homemade toffee bits for the store bought kind because I ran out. This caused some ugly spreading...
Went from this-
To this-
Eh so the first batch wasn't the prettiest bunch, but everyone LOVED THEM.
It took every will I had for me to NOT eat one of these dough balls straight from the pan...
(Also in the first batch you can see I forgot to flatten them slightly before baking, but I did the second time around)
Some cookies had a major case of the "ugly", for example-
He was promptly eaten.
And then there was the "clique", the pretty cookies of the bunch...grouped together...shunning the "spreads" (their words, not mine!).
I honestly don't know how bottom-left cookie made it in to the clique. Either way, they were all eventually eaten. And by "eventually" I mean WAY TOO SOON.

When it came to one lone cookie left in the container on the counter, I quickly snatched it up. I'm the one that made these master pieces, so it should be I that gets the very last one! :P  I was practically weeping as I slowly saw the cookie dwindle right in front of my very eyes. Or more appropriately- right in front of my mouth.

No worries, I took a picture of it-
Pretty much all I could think of was when I could make my next batch as soon as the first batch was gone.
 And luckily there was a perfect opportunity just days later!

We had a group of 4 people coming over for dinner last night and I knew this would be my chance to make these cookies again. This time, I thought ahead and actually made the dough 24 hours in advance. The longer dough sits in the fridge (to an extent) the better!
In addition, in place of Hershey's dark chocolate chips, I used slightly chopped up Ghirardelli bittersweet chocolate chips. Also, I made sure I bought a new bag of Health toffee bits so I wouldn't have to use homemade ones! (I still don't know the reason behind why the homemade bits spread so much compared to no/very minimal spreading from the store bought kind?)

The extra sitting time and normal toffee bits made for an even better and prettier cookie than before! How is that possible when a cookie is already an 11 on a scale that's 1 through 10?!

Well, let's just say you shouldn't ever make any other cookie ever again. Okay?
Yay for no ugly spreading of toffee!
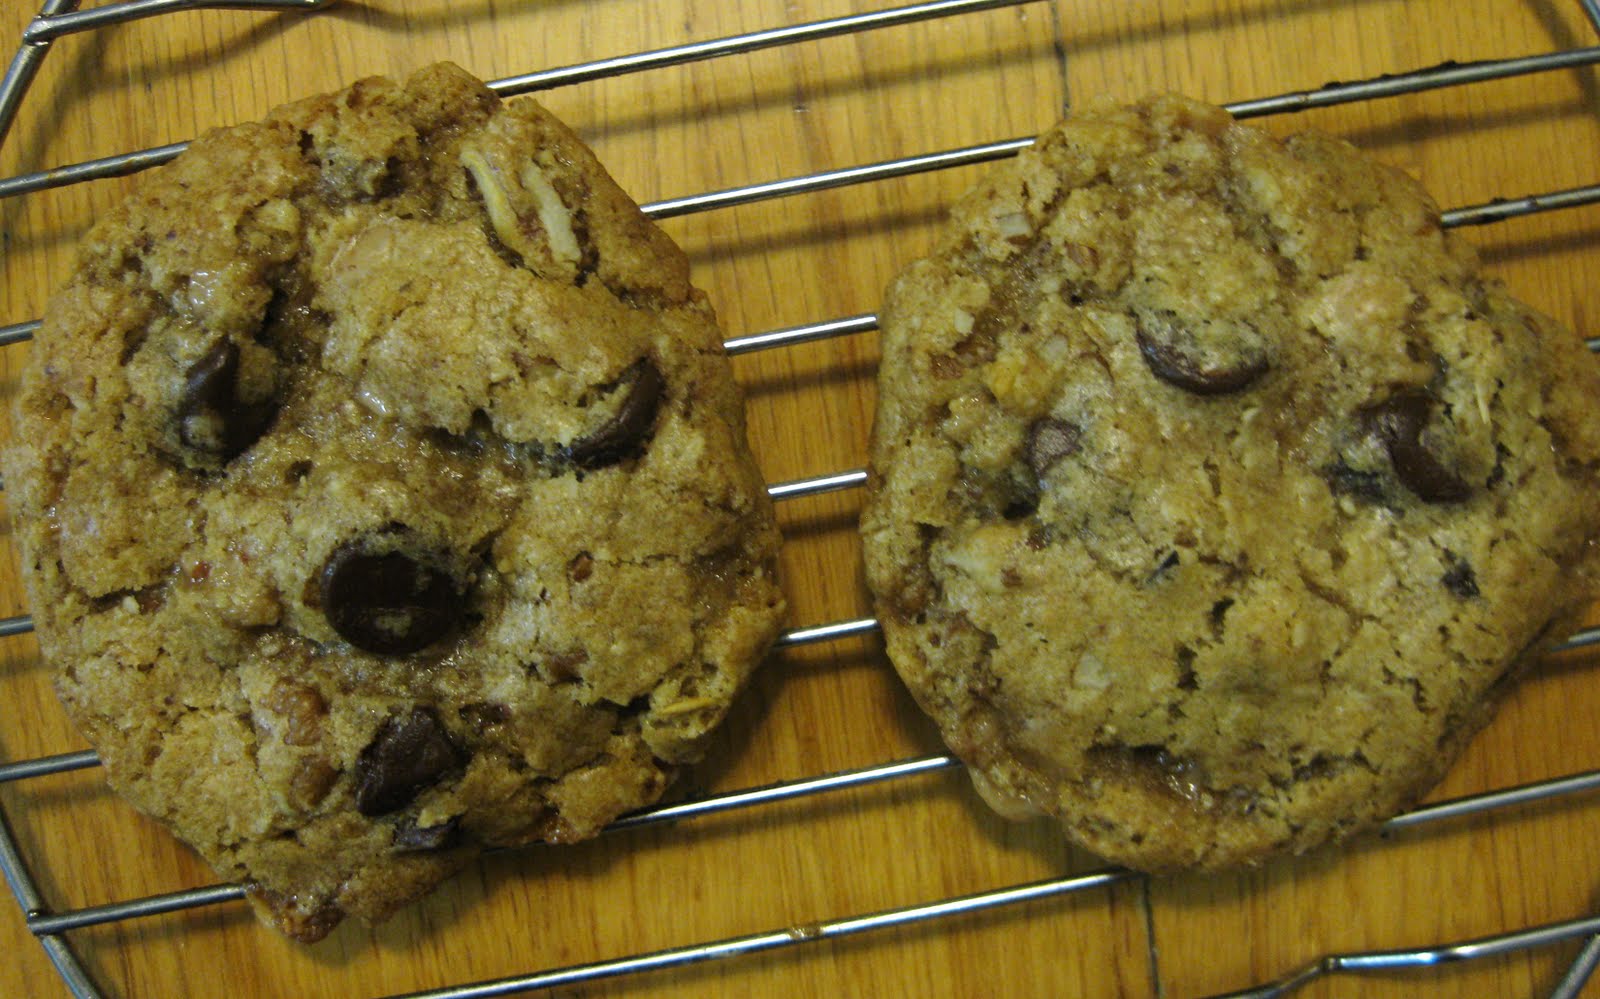
I went a little picture crazy-
I simply couldn't choose which picture looked the most appetizing!

I put out 16 cookies for our 4 guest to enjoy. 11 cookies disappeared between 4 people in the course of an hour! If that's not saying something than I don't know what does.

My parents are also in love (with the cookie...but yes, with each other too). These cookies are supposed to be reminiscent of the (apparently amazingly delicious) cookies they give you at the DoubleTree hotel (I've never been to one, so I don't know how they taste). Since my dad has stayed there, I asked him if they tasted as good as the DoubleTree cookies and he replied by saying "these are triple tree!" (that's his way of saying that they are "super good"). My mom repeatedly told me "These are really, really good" and my brother couldn't get enough. He asked "what is that special flavor?" my response was "toffee bits" and that's all he needed to understand- "Ahhhh."

And lastly, sometimes my toughest critic-my sister. I presented her with a fresh from the oven cookie; she took one bite, chewed. She began nodding her head and saying "mm hm, mm hm". The reason why she couldn't say much but an affirmative "mm hm" was because she was stuffing her face with the cookie. I kid you not. :D Eventually, after clearing her throat, she said "ohh yeah, these are good."

And the best part? It's actually surprisingly low in butter but you could never guess. In fact everyone mentioned that they bet there was "a lot of fat" in these cookies (in some form or another) because of how moist and decadent they tasted. The toffee bits (along with everything else) attribute to that special taste because actually, these cookie's flour/butter ratio is a modest 2.25! (if you're wondering what that means, check out my cookie post)

The best thing I love about these cookies is their crisp exterior and moist and buttery interior. They are thick, and the gooey dark chocolate works so well with all the other flavors...how can you go wrong with chocolate, toasted pecans, and toffee? You can't. You just can't!

Please. I urge you. Make these. NOW.
You will thank me.

Sunday, May 1, 2011

The Bun Run 5k!

Today I ran the Schlotzsky's Bun Run 5k with my dad. I ran the race last year with a time of 33 minutes so I was hoping I could beat that.

It started at 8:30, which isn't too bad, but I didn't get nearly enough sleep last night so I was pretty tired. Before the race I fueled up with my tradition pre-race breakfast of oatmeal and a scoop of nut butter (in this case, homemade dark chocolate almond butter). I've never experienced problems with this breakfast (i.e stomach upsets, side stitches, etc) so it's just become my go-to food before races. And this time, since I was so tired, I added a shot of espresso to my oats...that sure helped (:

Unlike the Cap 10k, the weather wasn't as perfect. The good thing was that it wasn't sunny; the bad thing was that it was pretty humid. You win some, you lose some!

Lined up and ready to go!
Yeah, I was definitely tired...
And my dad- (yes, that is his smiling face)
I decided to set my goal for 29 minutes and my dad set his goal for 45 (he was planning to walk most of it).

And off we went!

I actually got a cool app for my (new!) iPhone that tracked my run. It can tell you the elevation and stats such as distance, time, minutes/mile, and calories burned. Its called "iMapMyRun" and its free!
Here's the map of my run (click on "elevation" to see the elevation levels)

And how did I do time wise? I did it in 29 minutes and 14 seconds! It wasn't under 29 minutes, but I was able to shave off 4 minutes from my previous time :D

After I finished, I immediately munched on half a banana and chugged a bottle of water.

While I was waiting for my dad to finish, I decided to take a look at all the booths and freebies. One of the booths that was there was "Boundless Nutrition", a protein/nutrition bar company that is based in Austin. I had a chance to taste their Dark Chocolate Mint bar (freebie from packet pick-up!) and fell in love with both the taste AND the nutritional information. So often I see "nutrition" bars that are really candy bars in a healthy guise. These bars, however, only have 8 grams of sugar per bar, 5 grams of fiber, and 14 grams of protein! Not to mention tons of antioxidant and omega 3 fatty acids. I was stoked to see their booth so I could tell them how much I loved their product! I actually got to talk to the guy who started the whole thing and he was really happy that someone had so much appreciation for his product; I think it made his day!

He was so happy that he offered me a free Boundless Nutrition shirt! This shirt was one of those fancy, athletic/spandexy type shirts, so you can bet I was excited :D

I had the opportunity to try all of the other Boundless Nutrition bar flavors (Mocha, Dark Chocolate Peanut, and Blueberry Pomegranate Crunch) and I have to say my favorite is still the Dark Chocolate Mint; I just love that combination! There's just a hint of almond butter in the bar and it really rounds out all the flavors. If you're not a fan of the mint & chocolate combo, then the dark chocolate peanut definitely comes in as a close second. Its basically like a peanut butter chocolate rice krispie except for much much much much MUCH tastier.

As I was walking away, I was given a bag to carry all my goodies in and low and behold there was another dark chocolate mint bar in there! SCORE!

I got in line to get the rest of my goodies. This was probably the longest line I've ever seen but luckily it was going fast. I got two bags of Schlotzsky's potato chips (sour cream & onion and barbeque), a big bottle of Schlotzsky's hot sauce, some ear phones, a magnet to put my race picture in, two small chocolate chip cookies, and a small cinnabon cinnamon roll. Yes, every single racer got these things!

Then we moved over to a station that was giving out small cups of vanilla ice cream. This stuff was good! It wasn't the soft serve type, this one was thick and dense and melt in your mouth.

The freebie train wasn't over yet. We then got in an almost equally as long line for a free cupcake from "Hey Cupcake!", a well-known cupcake food trailer in Austin.
Hey Cupcake!
I think it was really awesome that they were giving out thousands of free cupcakes seeing as their cupcakes are normally $2.75 a pop.
As we got closer, I knew I would have to make a decision on which flavor I would get...
Almost there!
I was torn between all the delicious-sounding flavors but in the end went with the "double dose" -chocolate cake w/ chocolate buttercream.
It was super windy, so getting a shot without the little white paper flopping all over the cupcake was quite tricky.
My dad went with the "24 carrot" - carrot cake with cream cheese frosting.
I'm a total lover for carrot cake, but I love chocolate even more. :D

Since we had already eaten our fair share of sweets for the morning, we toted our cupcakes home for a treat later on.
And now for a picture of all my goods! (minus things already eaten)
My chocolate mint bars, the picture magnet, ear phones, athletic Boundless Nutrition shirt, hot sauce, cookies, cupcake, and chips!
And since I wasn't in the wind anymore, I took some more pictures of my cupcake-
So dark looking!
I'm saving this guy for dessert later tonight so I can't tell you how it tastes yet. But really, do I need to? Just look at it!!